Cat Water Spray
How to avoid being woken up by my cats? Spray some water on them if they insist!
I love my cats. But they can be really annoying... One of them tries to enter our bedroom every day at 5am, by scratching the door.
I want to be able to stop it! That's why I created my water-spray!
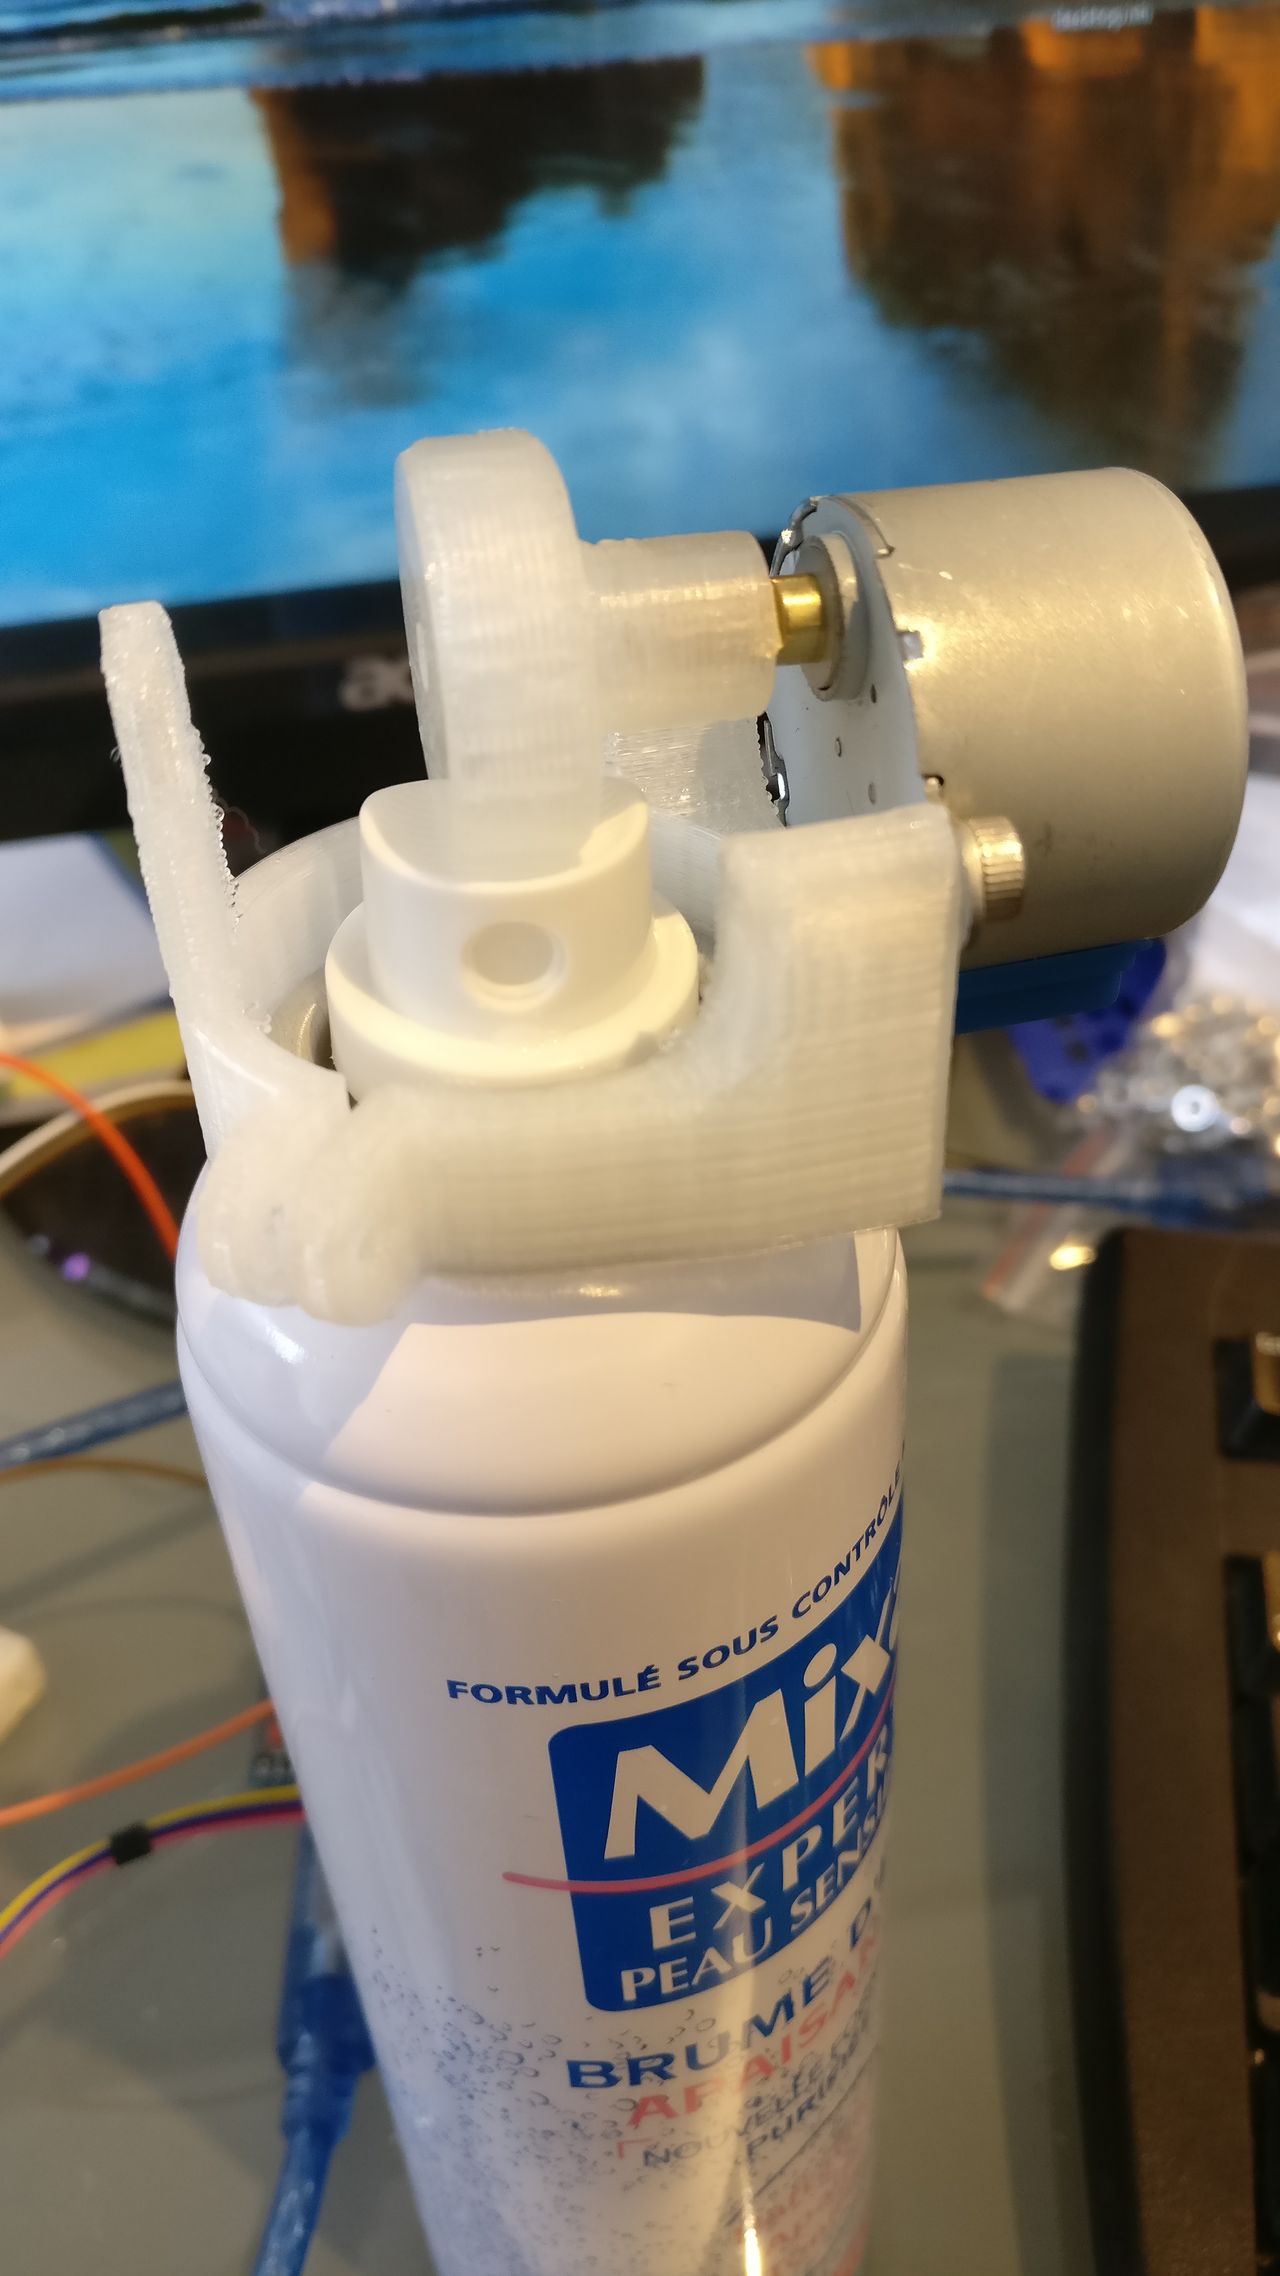
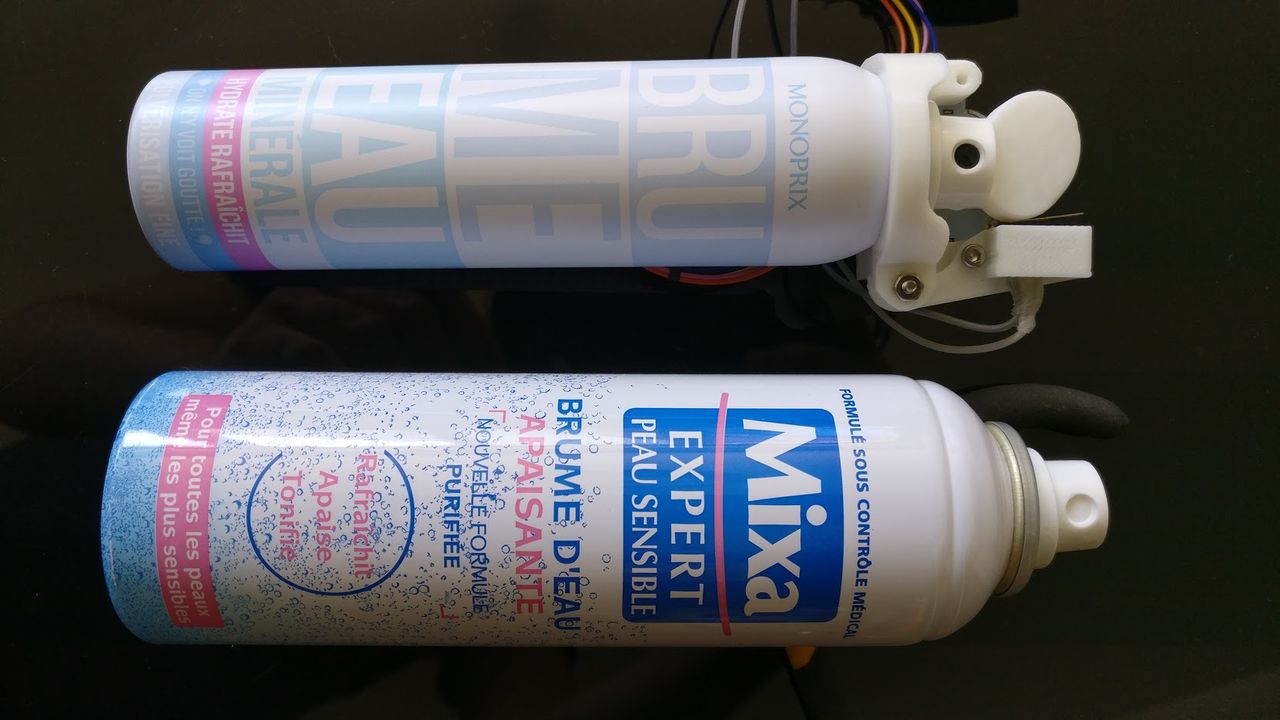
For that, I based my development on a MIXA atomizer (bought on Amazon for less than 4€).

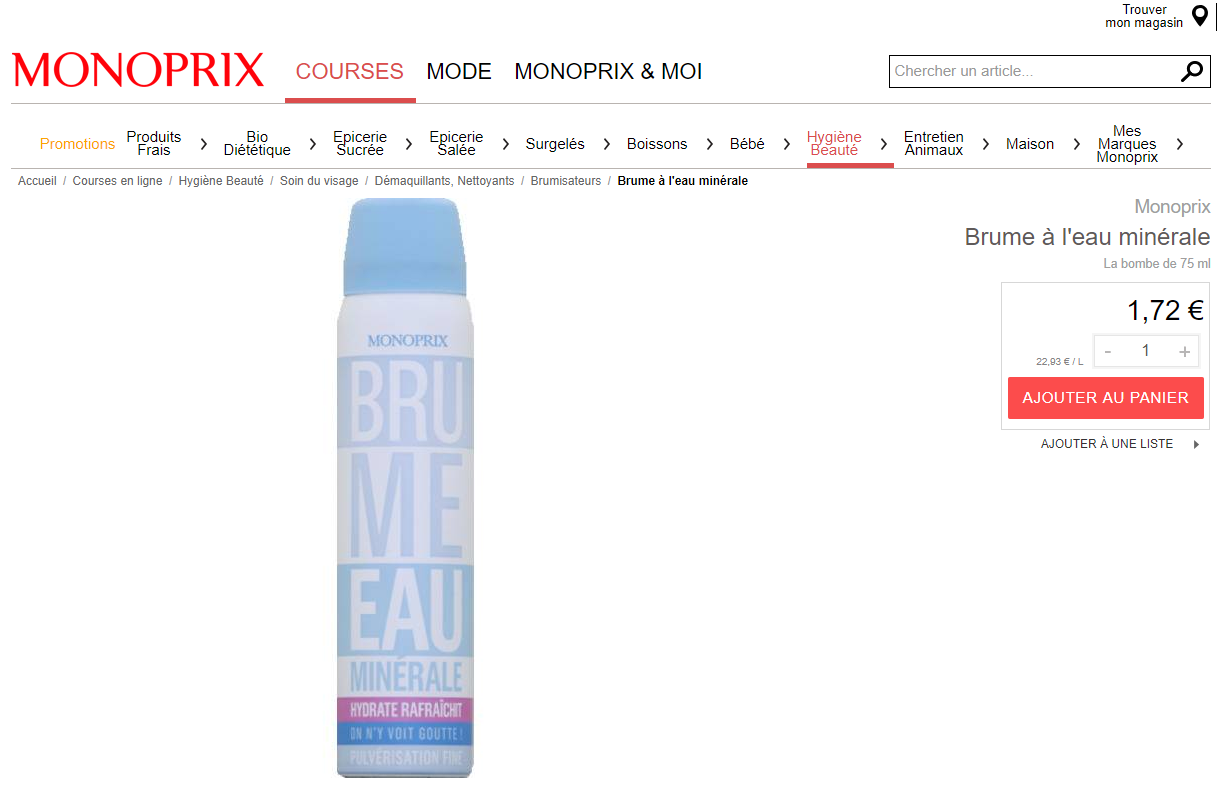
Later on, I used a smaller atomizer from Monoprix:
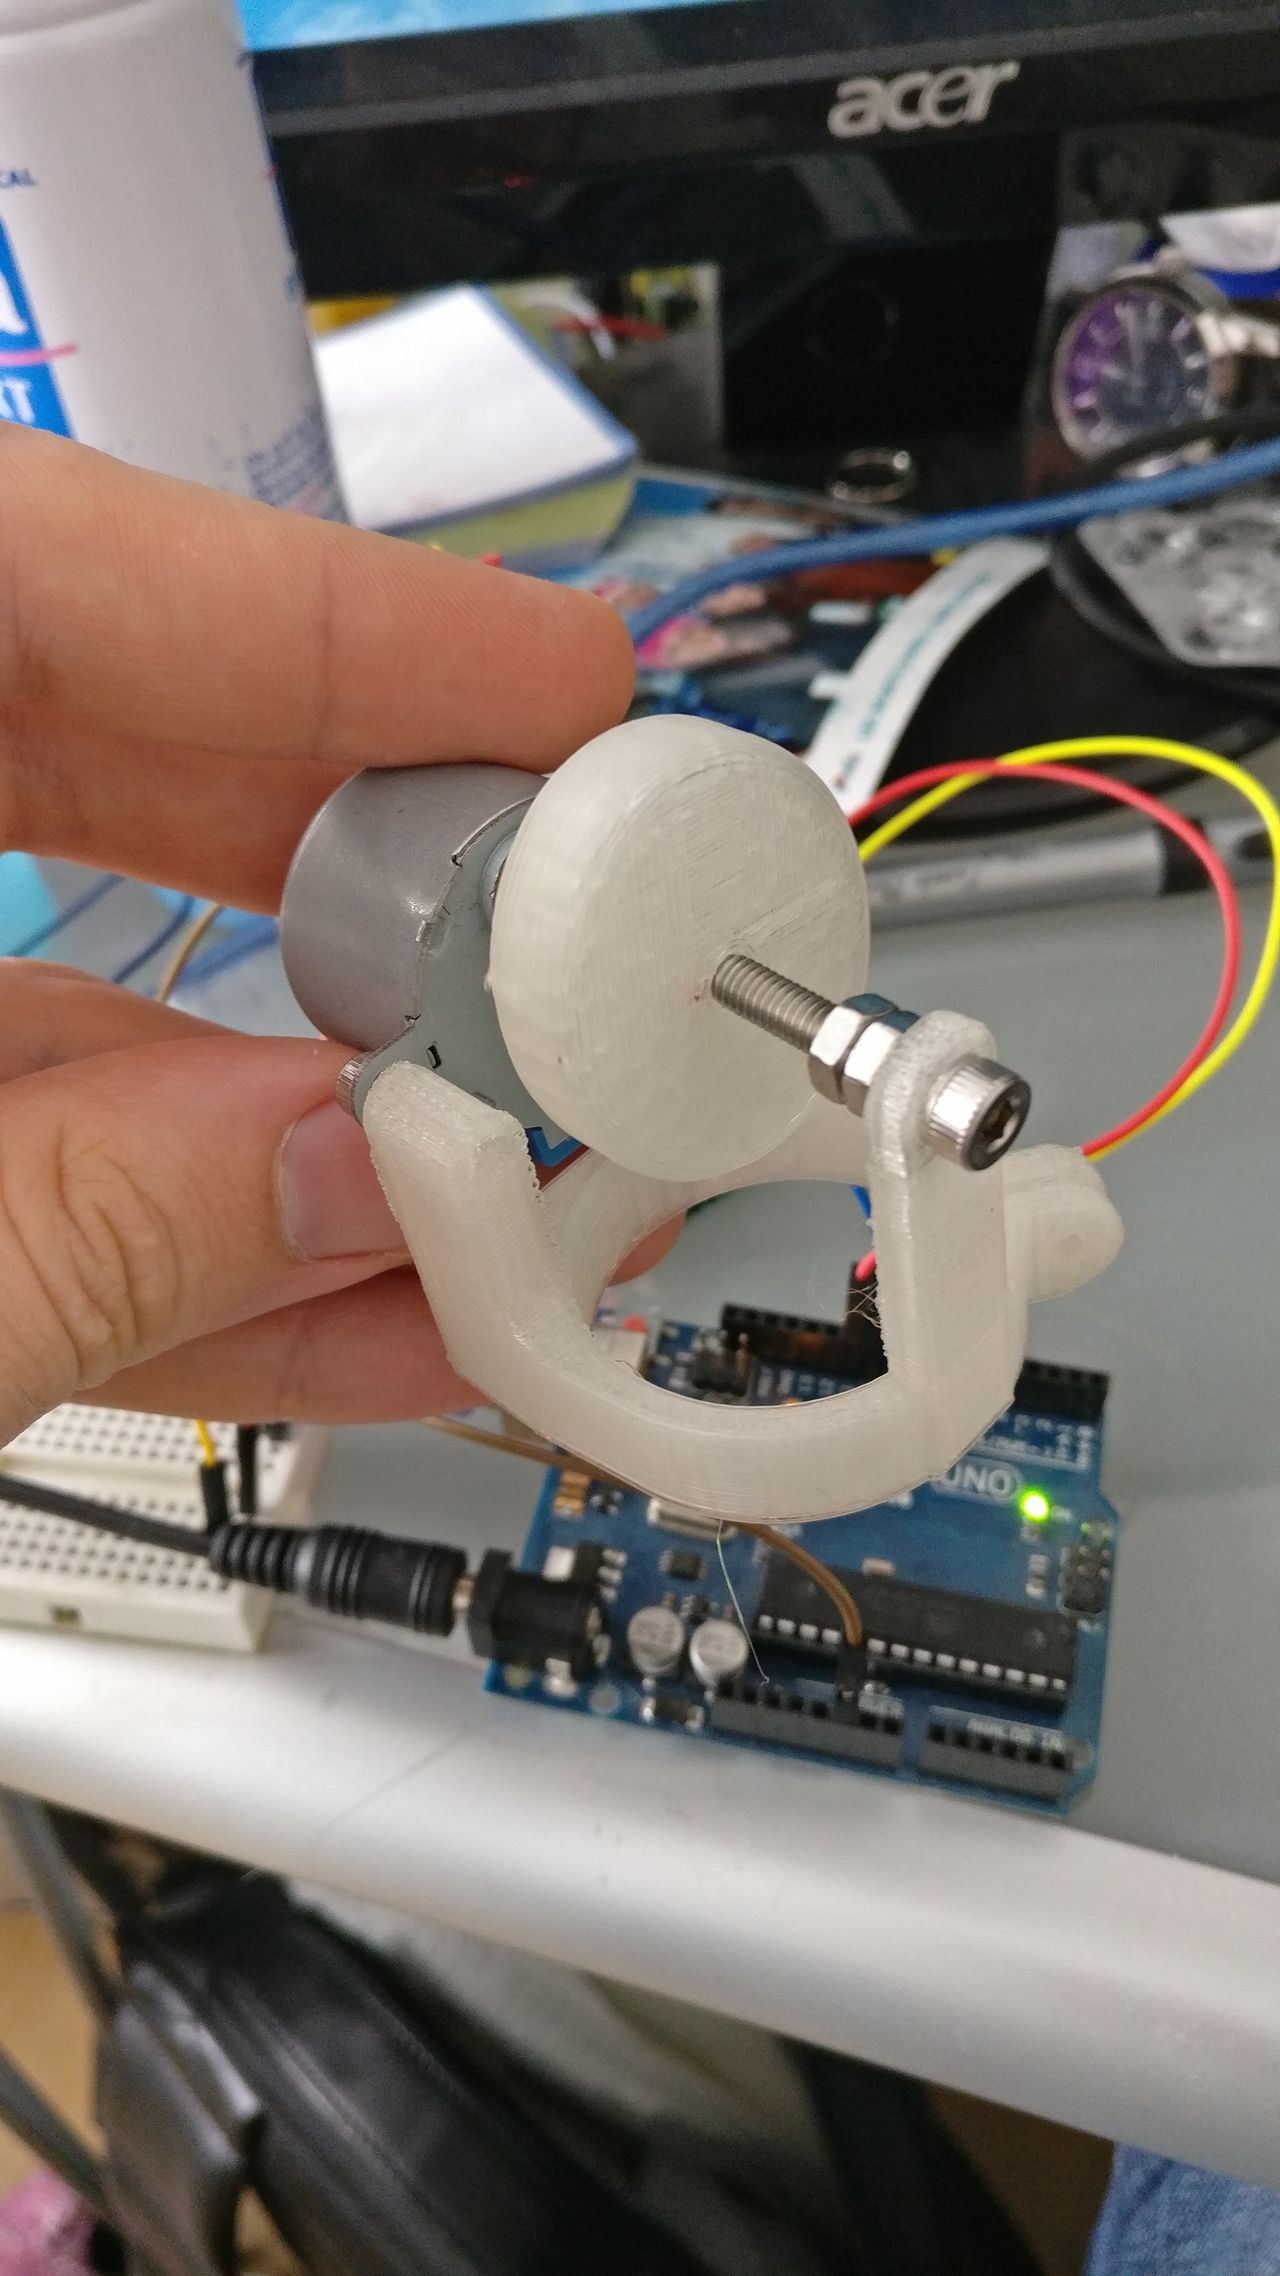
The plan was simple: a stepper motor will have a small elliptic wheel attached, which can press / release the button of the spray can.
I wanted to create a very simple device, so I chose a stepper motor cheap and very common, the 28BYJ-48.
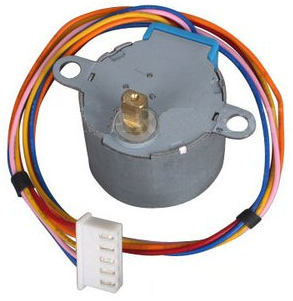
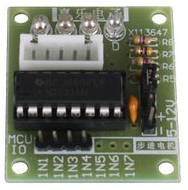
This motor can be driven by a module based on the ULN2003 chip.
Concept test
For those tests, I used an Arduino and some simple sketches to rotate the wheel.
First iteration
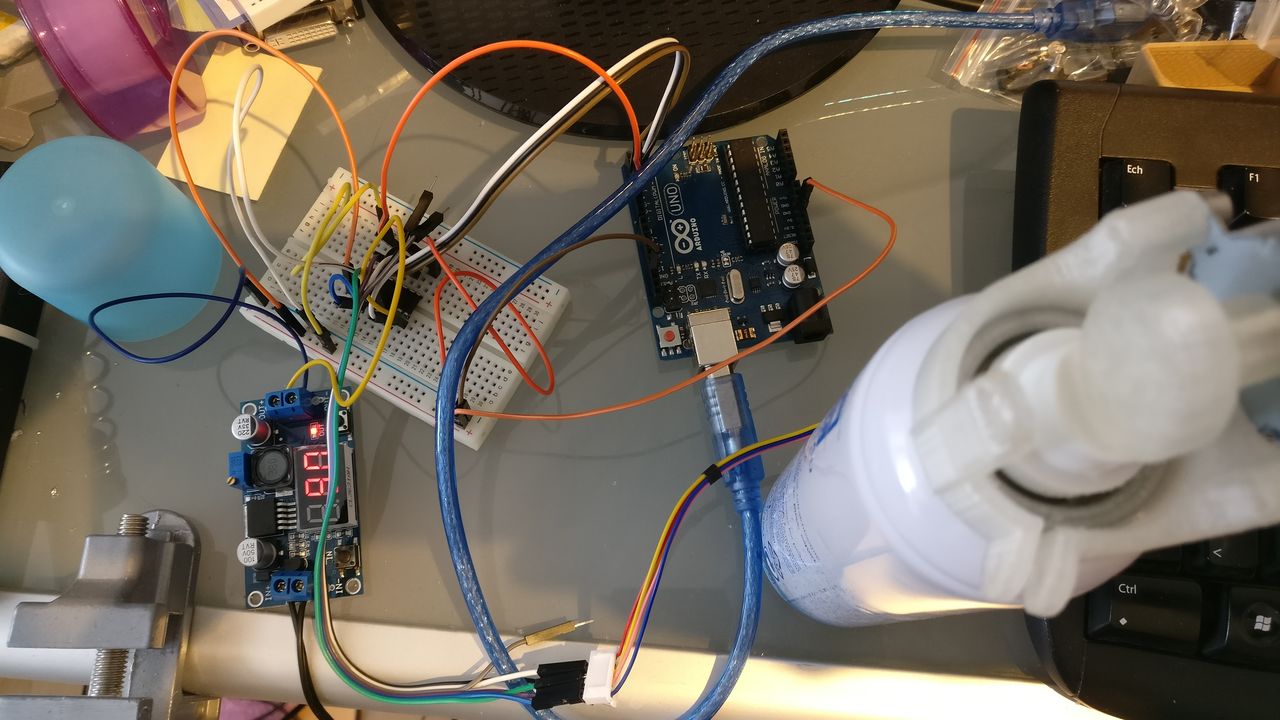
I printed some pieces designed with Fusion 360, and used the ULN2003 based module.
The stepper motor is powered by a separated 5V power supply while the Arduino is powered over USB.
Test source code
I used the CheapStepper library to test the concept.
#include <Arduino.h>
#include <CheapStepper.h>

CheapStepper stepper (2, 3, 4, 5);

void setup() {
  stepper.setRpm(7); // Cannot be lower than 6
}

void loop() {
    stepper.moveDegreesCW(360);
    delay(1000);
}
With IN1 <=> Pin 2, IN2 <=> Pin 3, IN3 <=> Pin 4, IN4 <=> Pin 5.
Epic fail!
Even if I put my design issues aside, the stepper motor wasn't able to push the cap.
Second iteration
I tried to simplify the design, hopping it will work this time.
Epic fail!
Sadly, it didn't worked, the motor was still struggling to press the spray cap.
Third iteration whith an H-Bridge
I didn't do a scientific approach on this subject. I should have compute the torque needed to press the cap, but as I don't know how to do that, I preferred the try-and-learn method :)
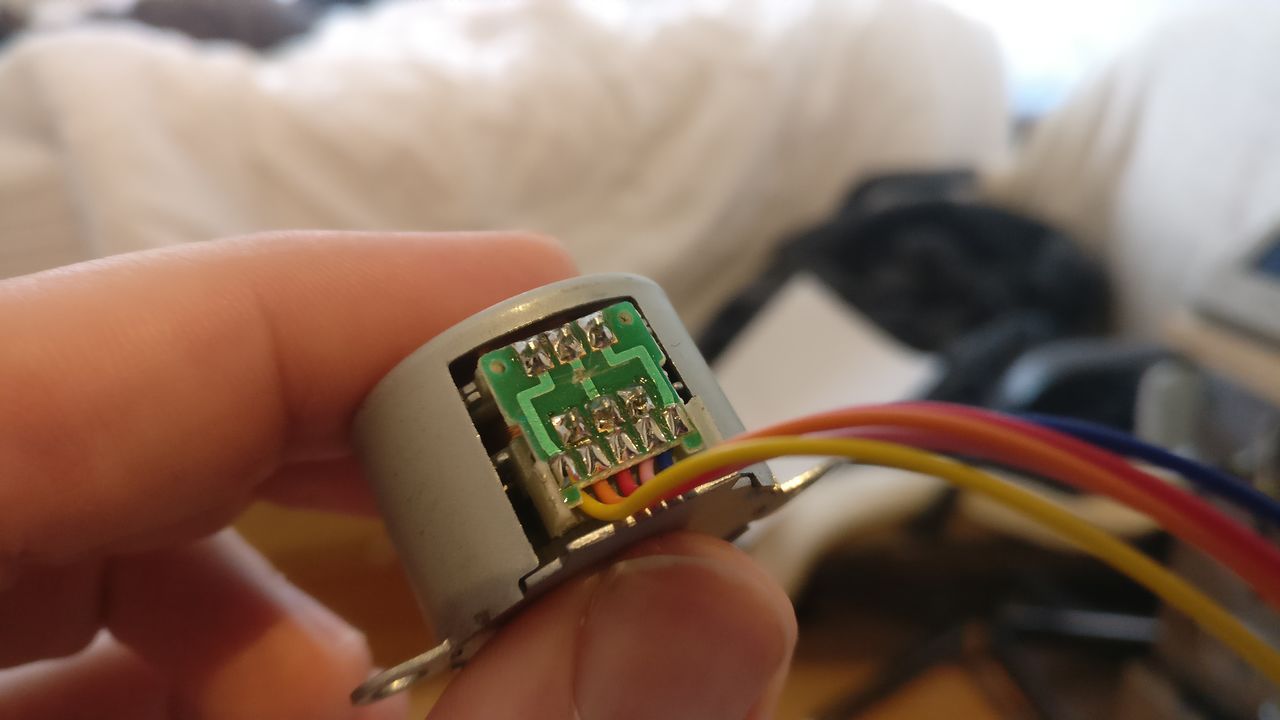
I found this video and article, explaining how to transform this little motor to a bipolar motor.
This modification adds a lot of torque to the motor, but sadly, it cannot be used with the basic controller board.
Fortunately, I already had some L293D chips (H-Bridge).
First, I cut the PCB trace on the motor:
Then, I connected the motor and the Arduio trough the L293D chip (source) :
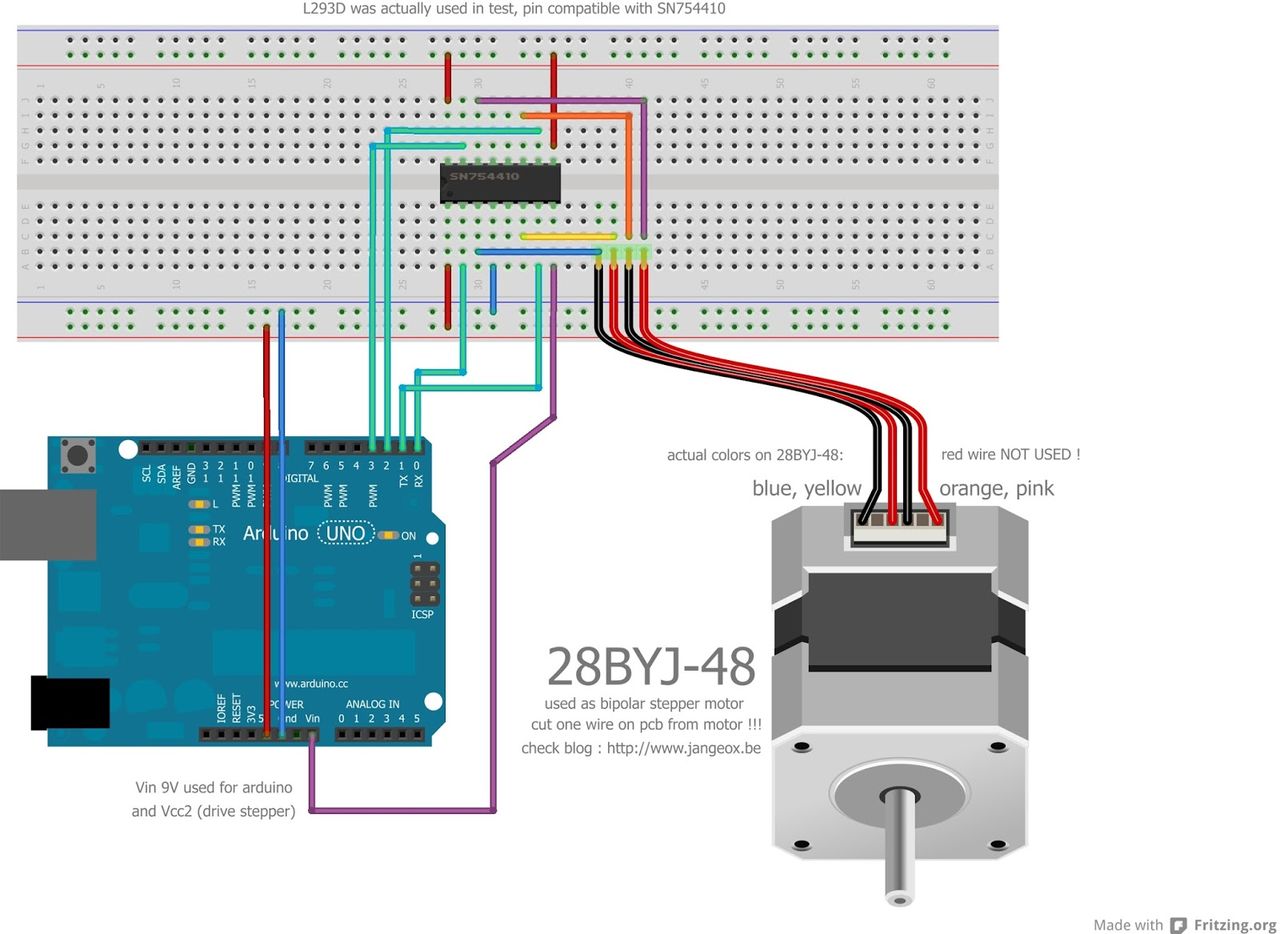
I personally used the pins 2 to 5 to be able to use the serial port (pin 0 and 1).
As the windings are twice as long as in the original version, I can use the motor at 9V (instead of 5V).
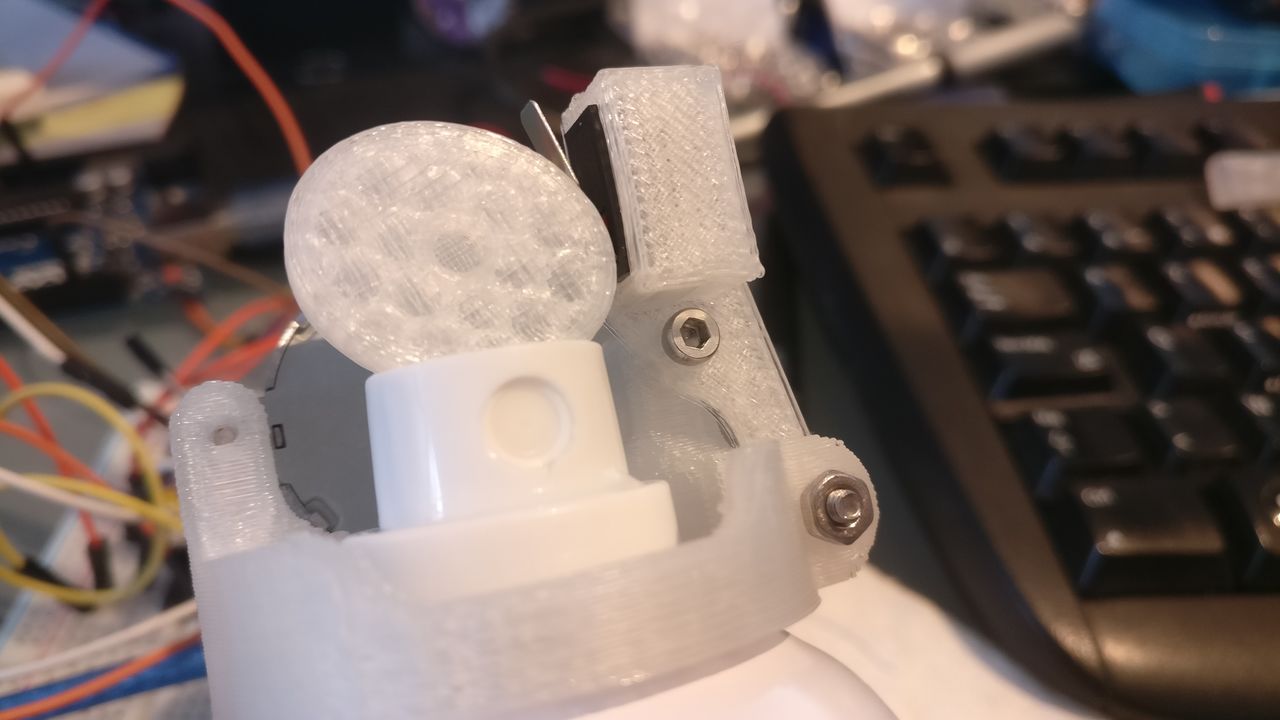
I also changed my design a bit.
And... it worked !
Test source code
I used the stepper library included in the latest version of the Arduino platform.
Note: I don't use the same Arduino mapping as the previous schematics
#include <Arduino.h>
#include <Stepper.h>

// The gear reduction ratio is approximately 64:1 (tested: 63.68395:1)
// 64 steps per motor rotation x 63.684 gear ratio = 4076 steps per full revolution (approximately)
const int stepsPerRevolution = 4076;

Stepper myStepper(stepsPerRevolution, 2, 3, 4, 5);

void setup() {
  myStepper.setSpeed(7);
}

void loop() {
  // step 1/100 of a revolution:
  myStepper.step(stepsPerRevolution / 100);
}
Motor wheel position
To go further on this project, I needed to be able to monitor the current state of the device: is it currently spraying water or not ?
I used a basic micro switch, which can be used as endstop o 3D printers.
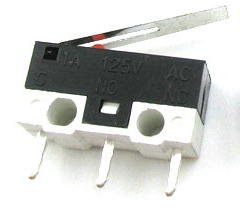
I designed a little switch holder, which can be mounted on the current design.
The switch is closed when the wheel is not pushing the spray cap.
Better tork
After few attempts, I realized that the tork was sometime still not enough, getting the wheel stucked while pushing the cap.
Note: more the spray bottle contains liquid (and gas), more strength is needed to push the cap
I tried to use a 12V power supply, and it did the trick!
3D printed parts
You can find the CAD model below. Please note that the spray bottle model is approximative, and I adjusted the dimensions of each part after testing them.
Detect some movement
I was able spray some water, and it was time to do it automatically!
For that, I used an HC-SR04: it's cheap, works for a range from 2cm to 200cm, and at 5V.
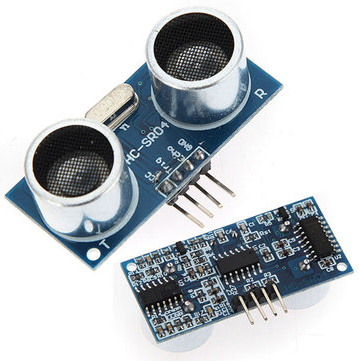
One think to notice: I had to add a delay between each distance reading, to avoid any noise from the previous reading. I used a 200ms delay, as it seems to work fine, but I didn't try to find the best value.
MCU
I used an Arduino pro mini at 5V.
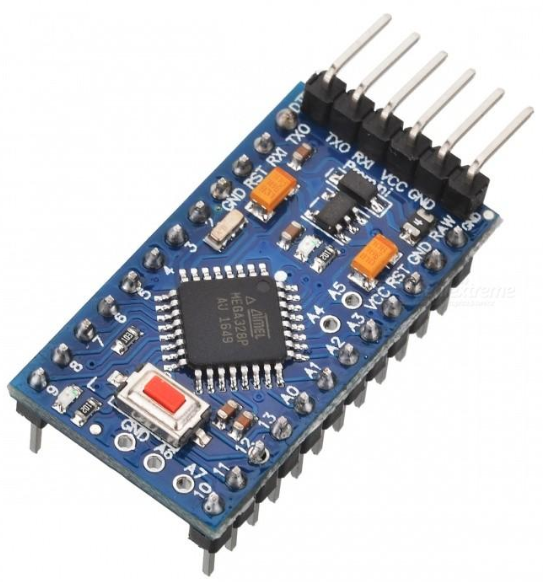
There is a voltage regulator on board so it can accept voltage up to 12VDC. As I was supplying 12V to the board, I used the "RAW" pin and not VCC.
But after few attempts, the regulator stopped to work (no output). I still don't know why. The regulator is only used to power the HC-SR04 (15mA during use) and the L293D. I had to use another regulator to power the L993D chip and the Arduino.
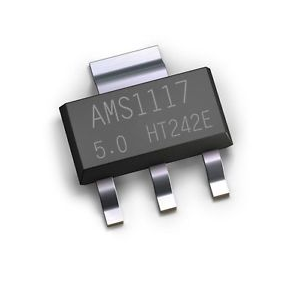
Power regulator
I used an AMS1117 @ 5V, with two 10µF capacitors (one between Vin and GND, the other between Vout and GND).
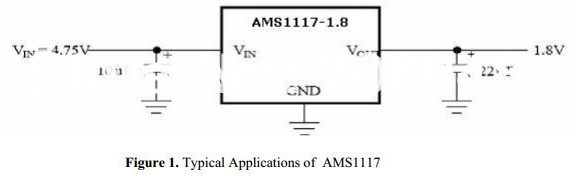
Note: the typical appliation picture is for an 1.8V output, but is also valid for the 5V version of the AMS1117
Full circuit
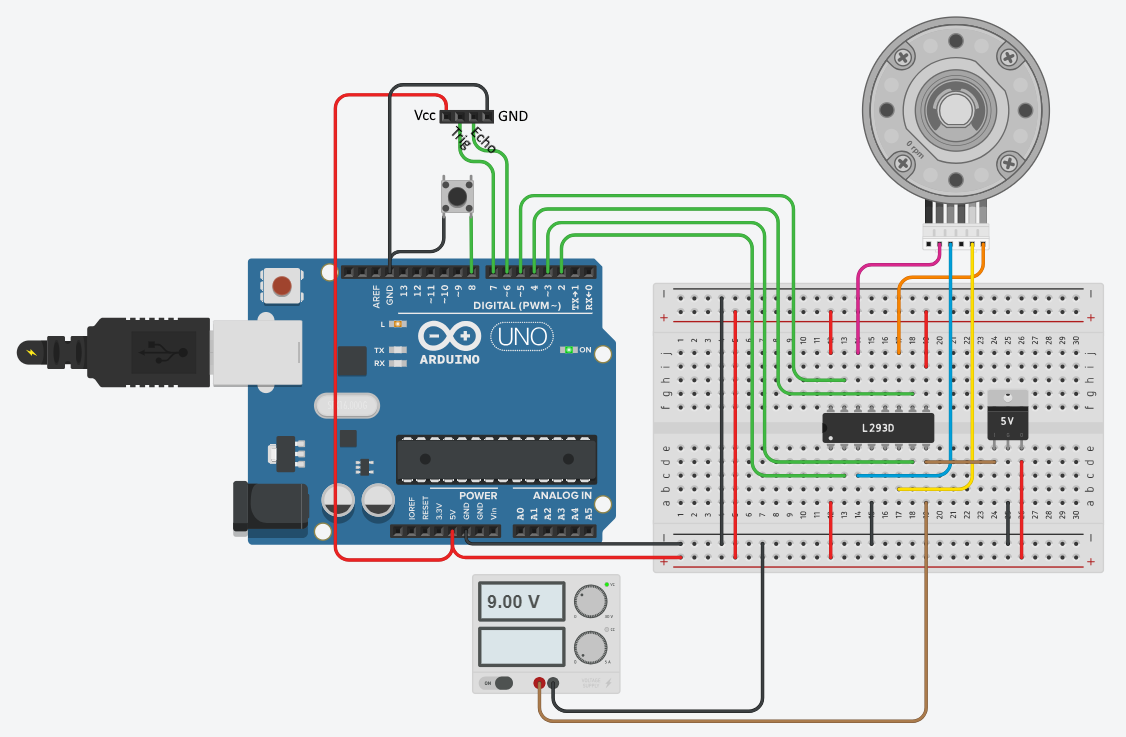
- Power supply: 12V to H-Bridge (to power the circuit) and AMS1117.
- AMS1117 powers the HC-SR04, the Arduino pro mini and the L293D.
- The L293D pins 4, 5, 12, 13 are used as GND and heat sink.
Note : Due to le limited capacities of Tinkercad, I had to swap some components.
Source code
- Starts and assumes that the spray cap is not pushed
- Measures the distance X times, as reference
- In loop, if the distance is less than 90%, power on the built-in LED
- If after 2s, the distance is still not closed to the reference, spray 1 time
To controll the Stepper, I used the Stepper library from the Arduino framework.
Sadly, after a powering the device a while, even without using it, the stepper become hot.
After reading the stepper library source code, I realized that the motor is never powered off between usages. I had to power it off manually to avoid overheat.
You can get the full source code on Github.
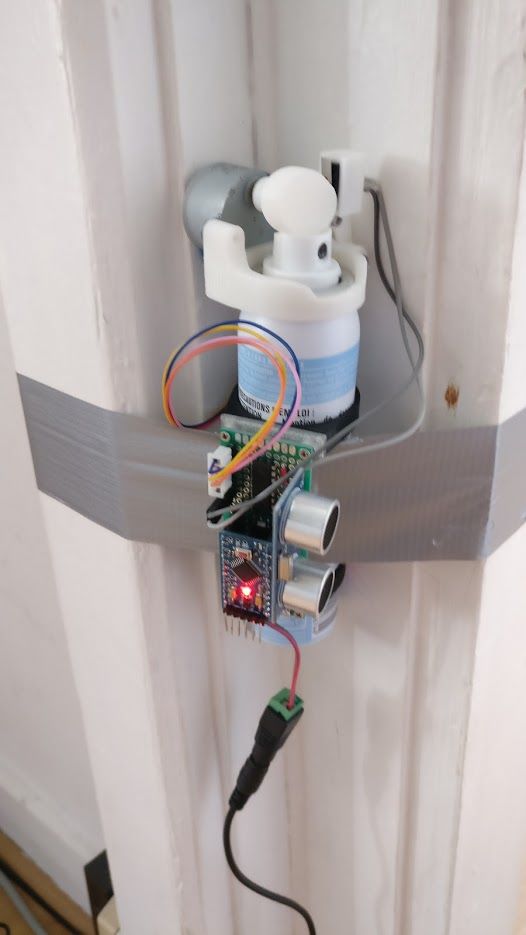
Perfboard

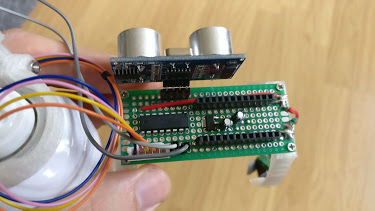
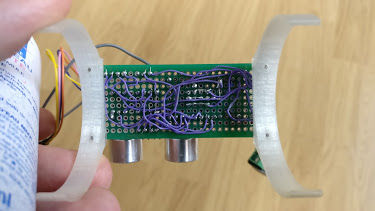
PCB mount
I created some small pieces to be able to mount the PCB on the bottle.
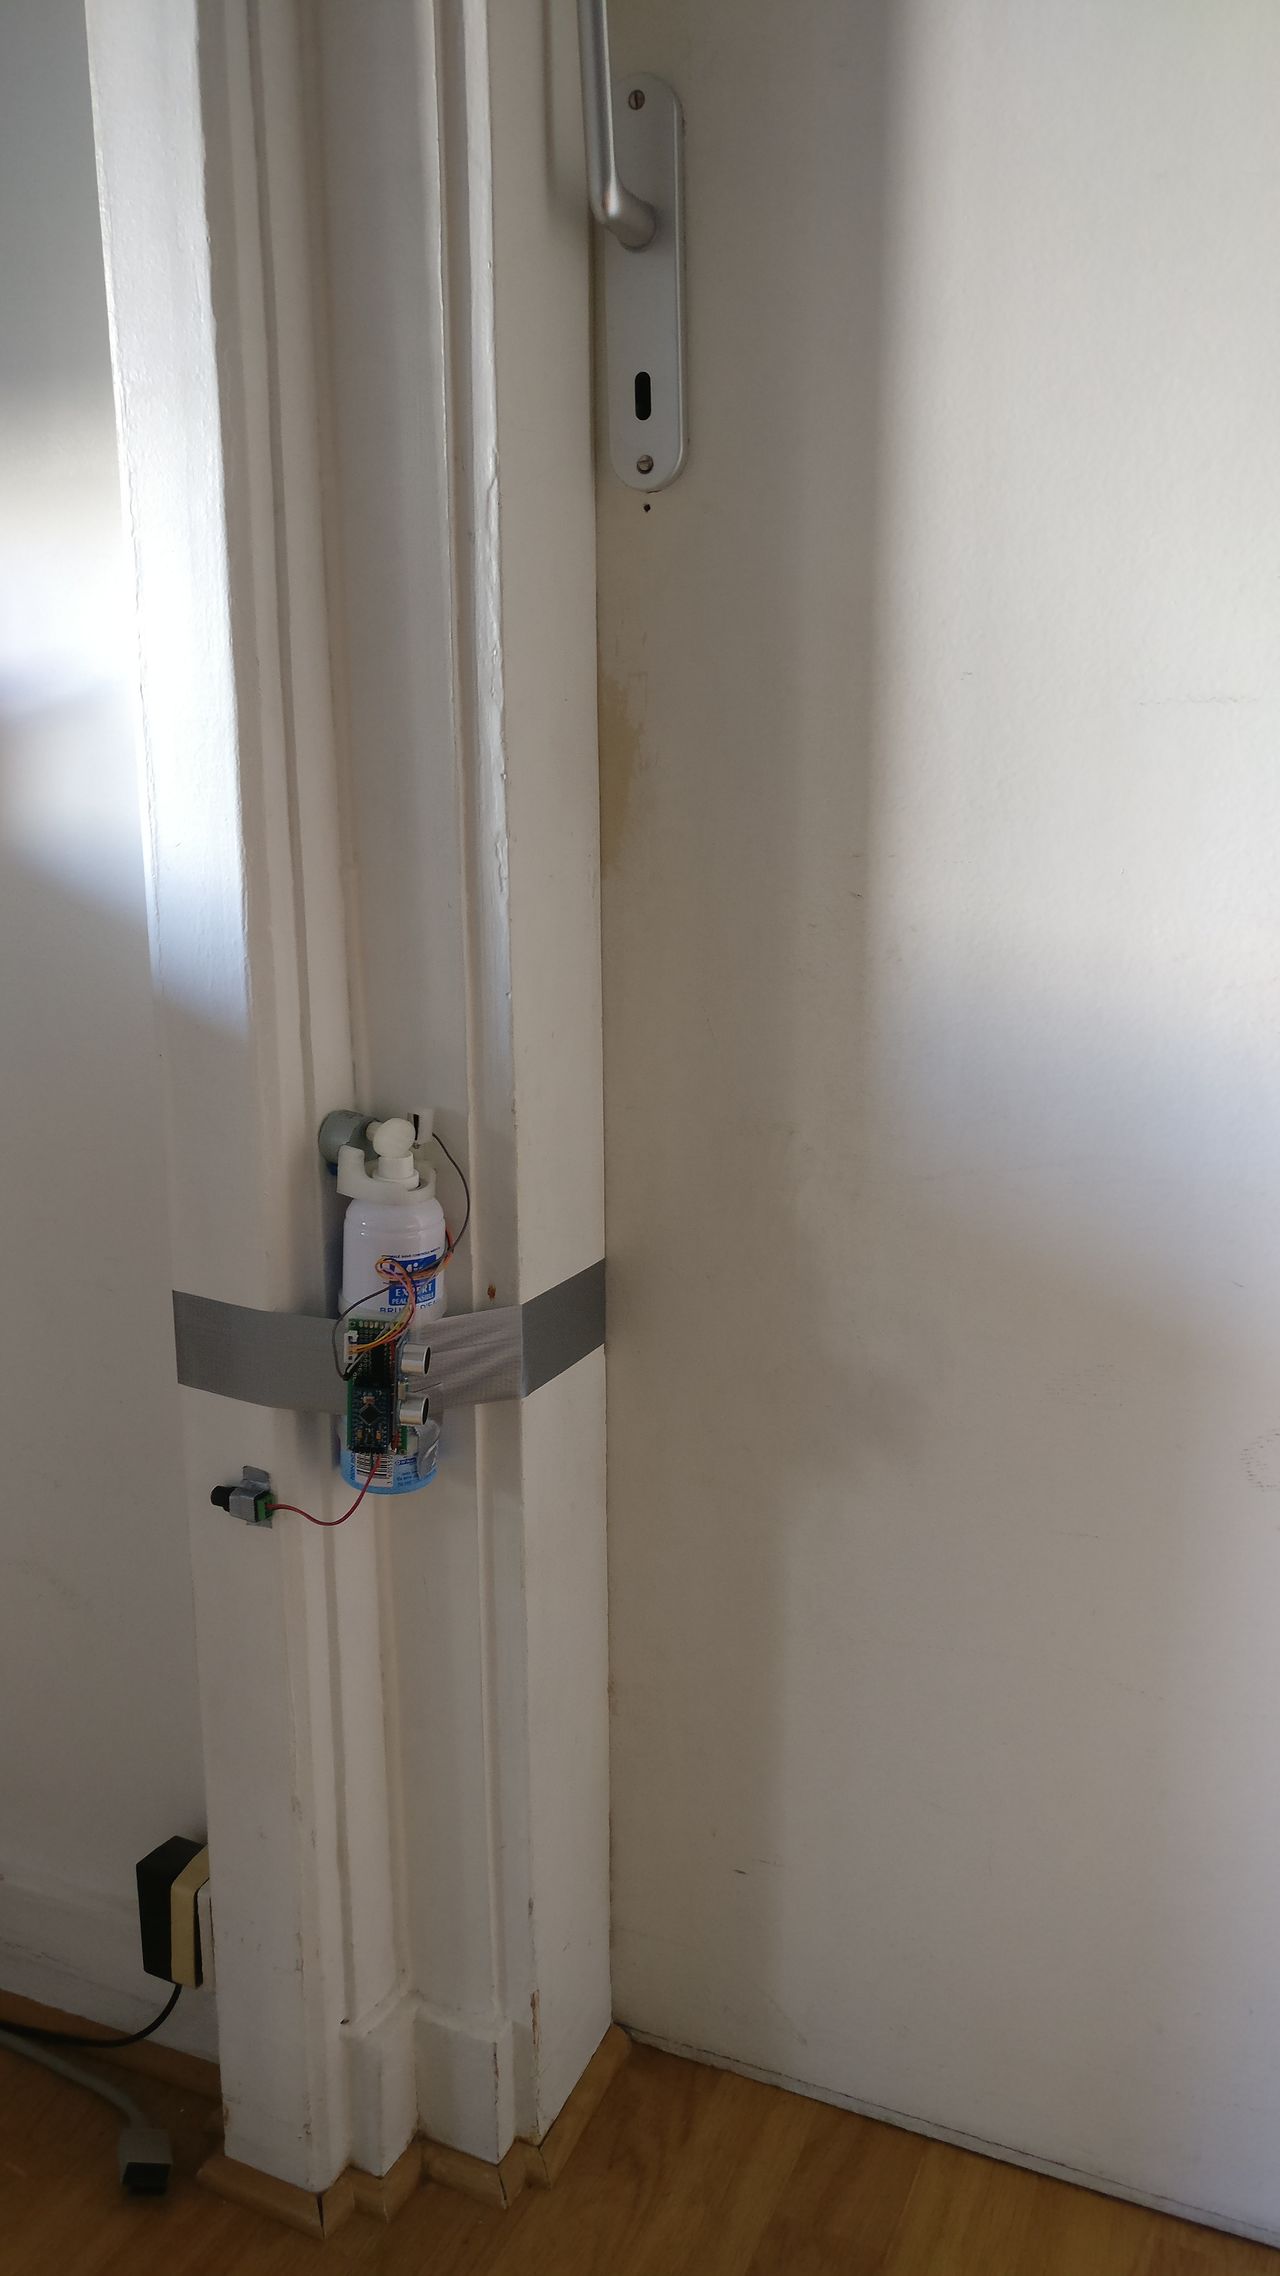
Installation
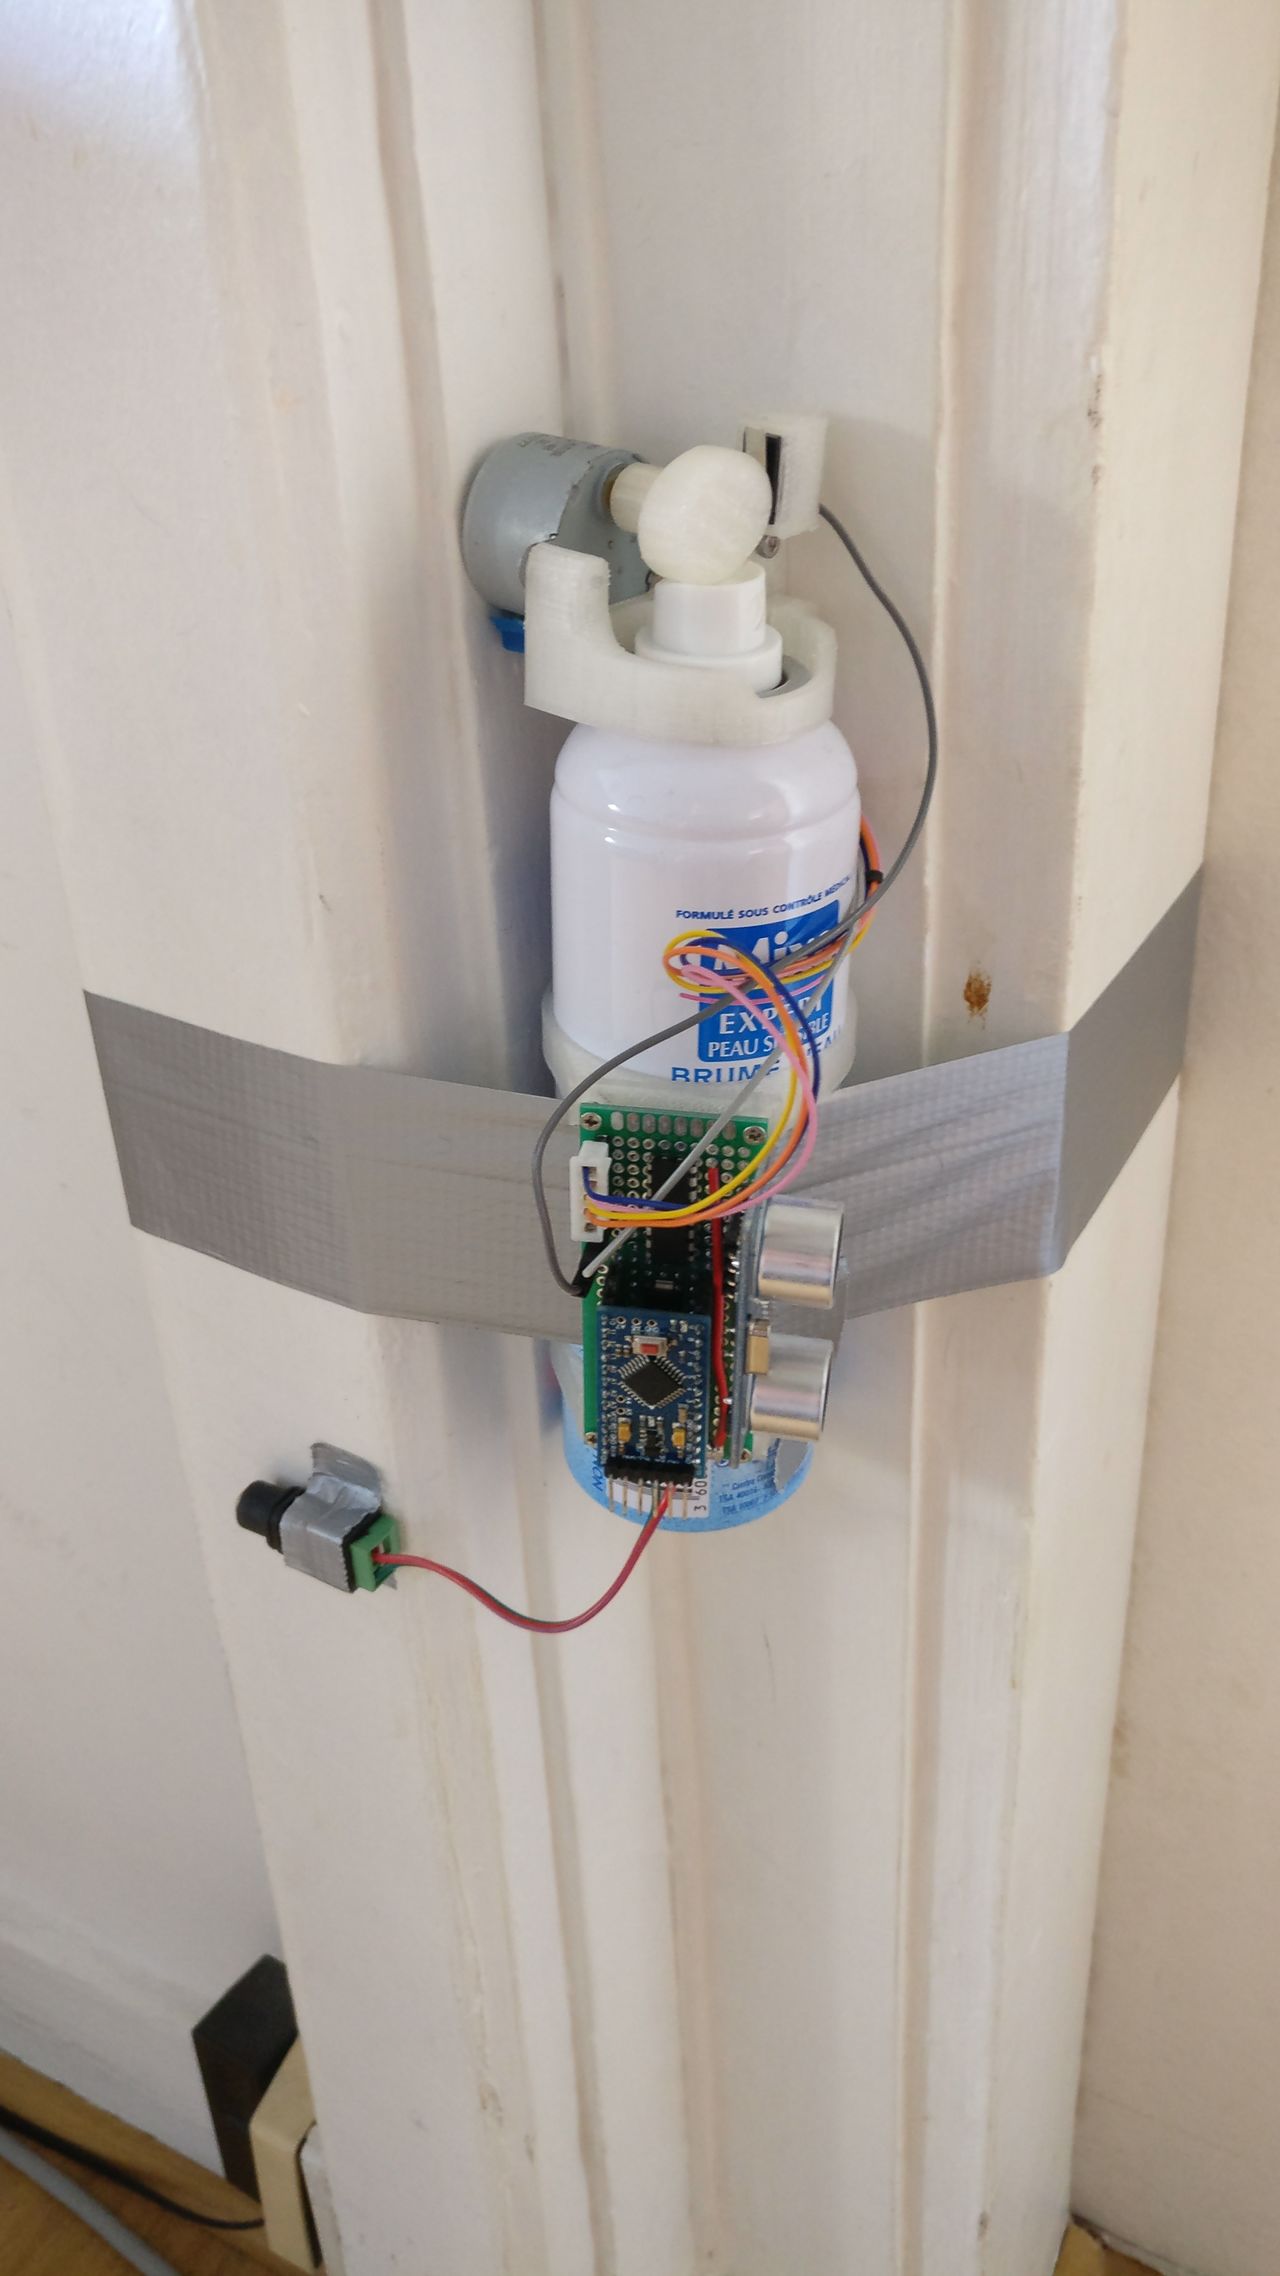
Smaller container
As I don't need the 150mL for this application, I also tried to use a Monoprix version with only 75mL. Fortunately, the cap and the top of the bottle is similar and quite common. I was able to use the same design without any modification.
I just tweaked some dimension to have a more reliable solution.
Conclusion
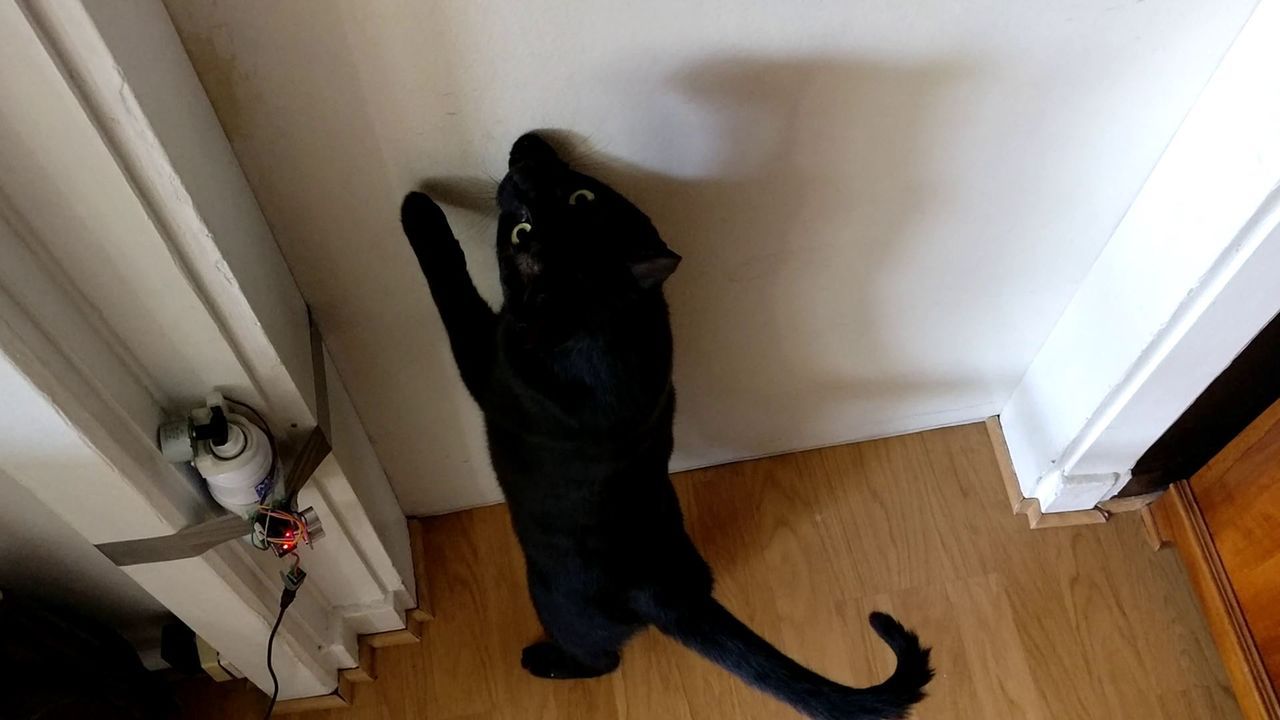
It works!
Once the device tapped to the wall near the door, the cat only scratches the door one time!
The device looks shitty, but I hope it's only temporary, and the cat will quickly understand that this behavior is to avoid.