Flash a VS-TY2662-V1 LCD controller
How to flash a VS-TY2662-V1 controller to use a salvaged LCD screen.
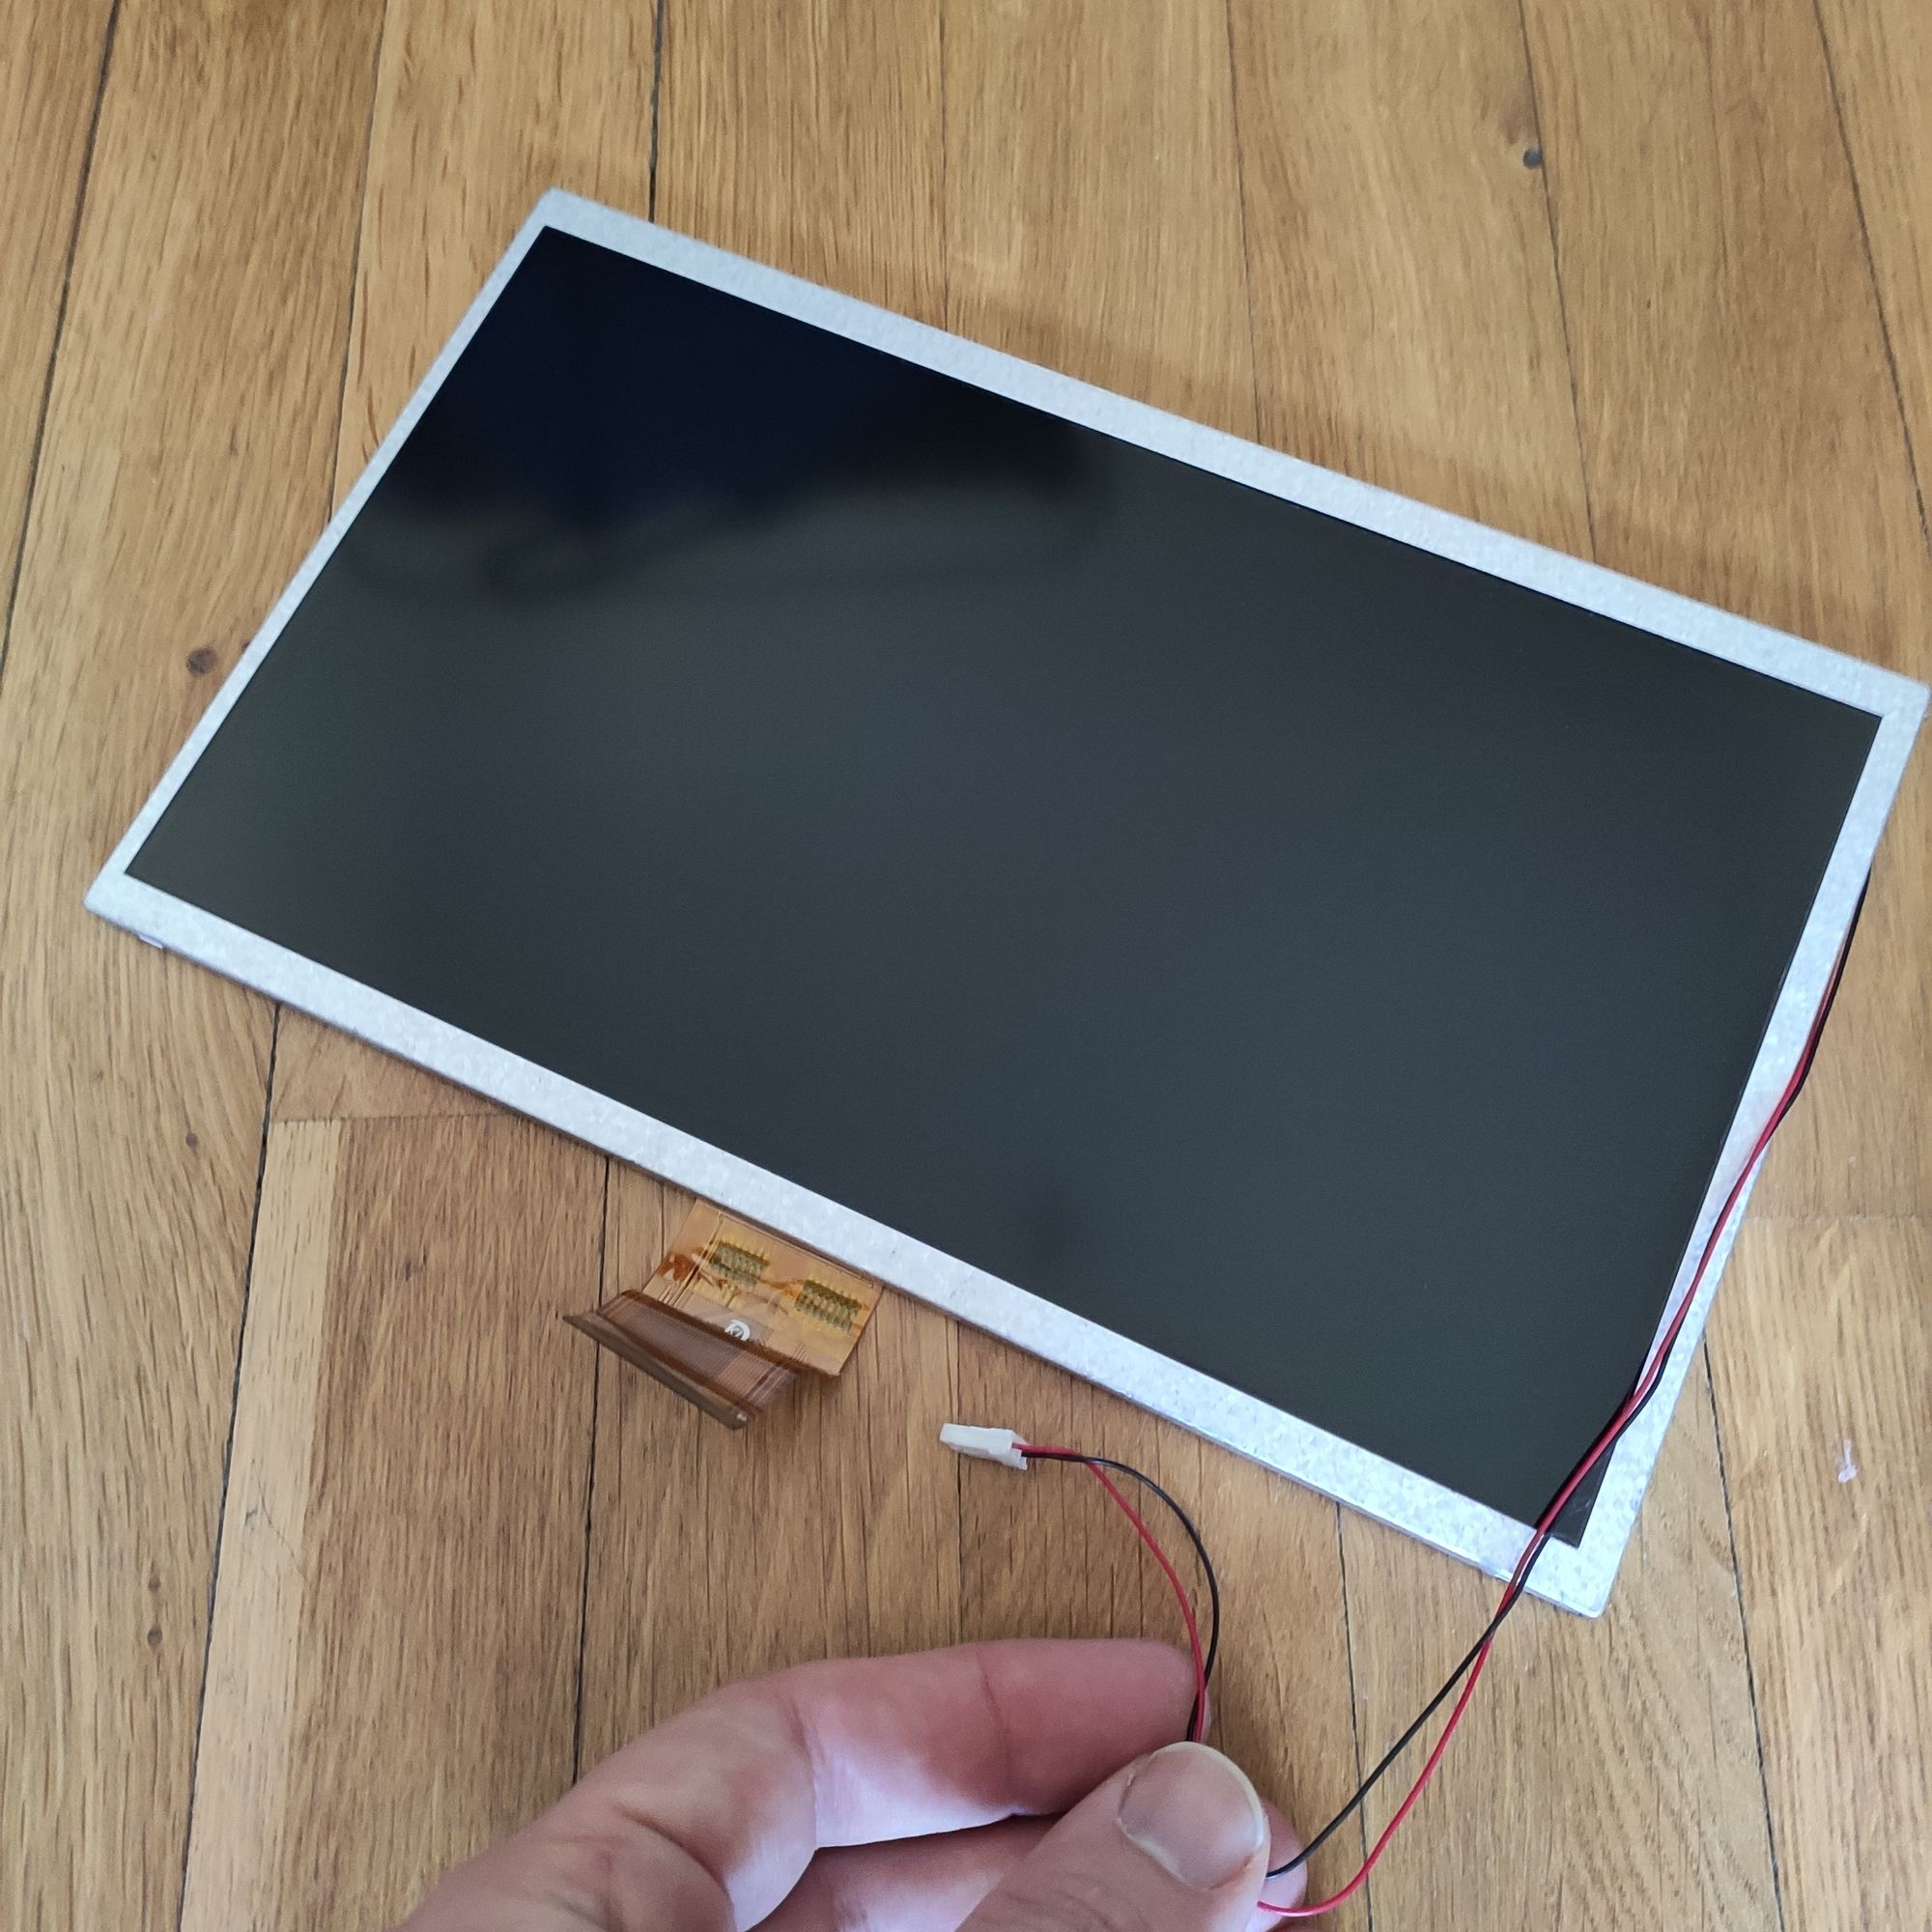
I salvaged an LCD screen from a cheap non working Android laptop few years ago.
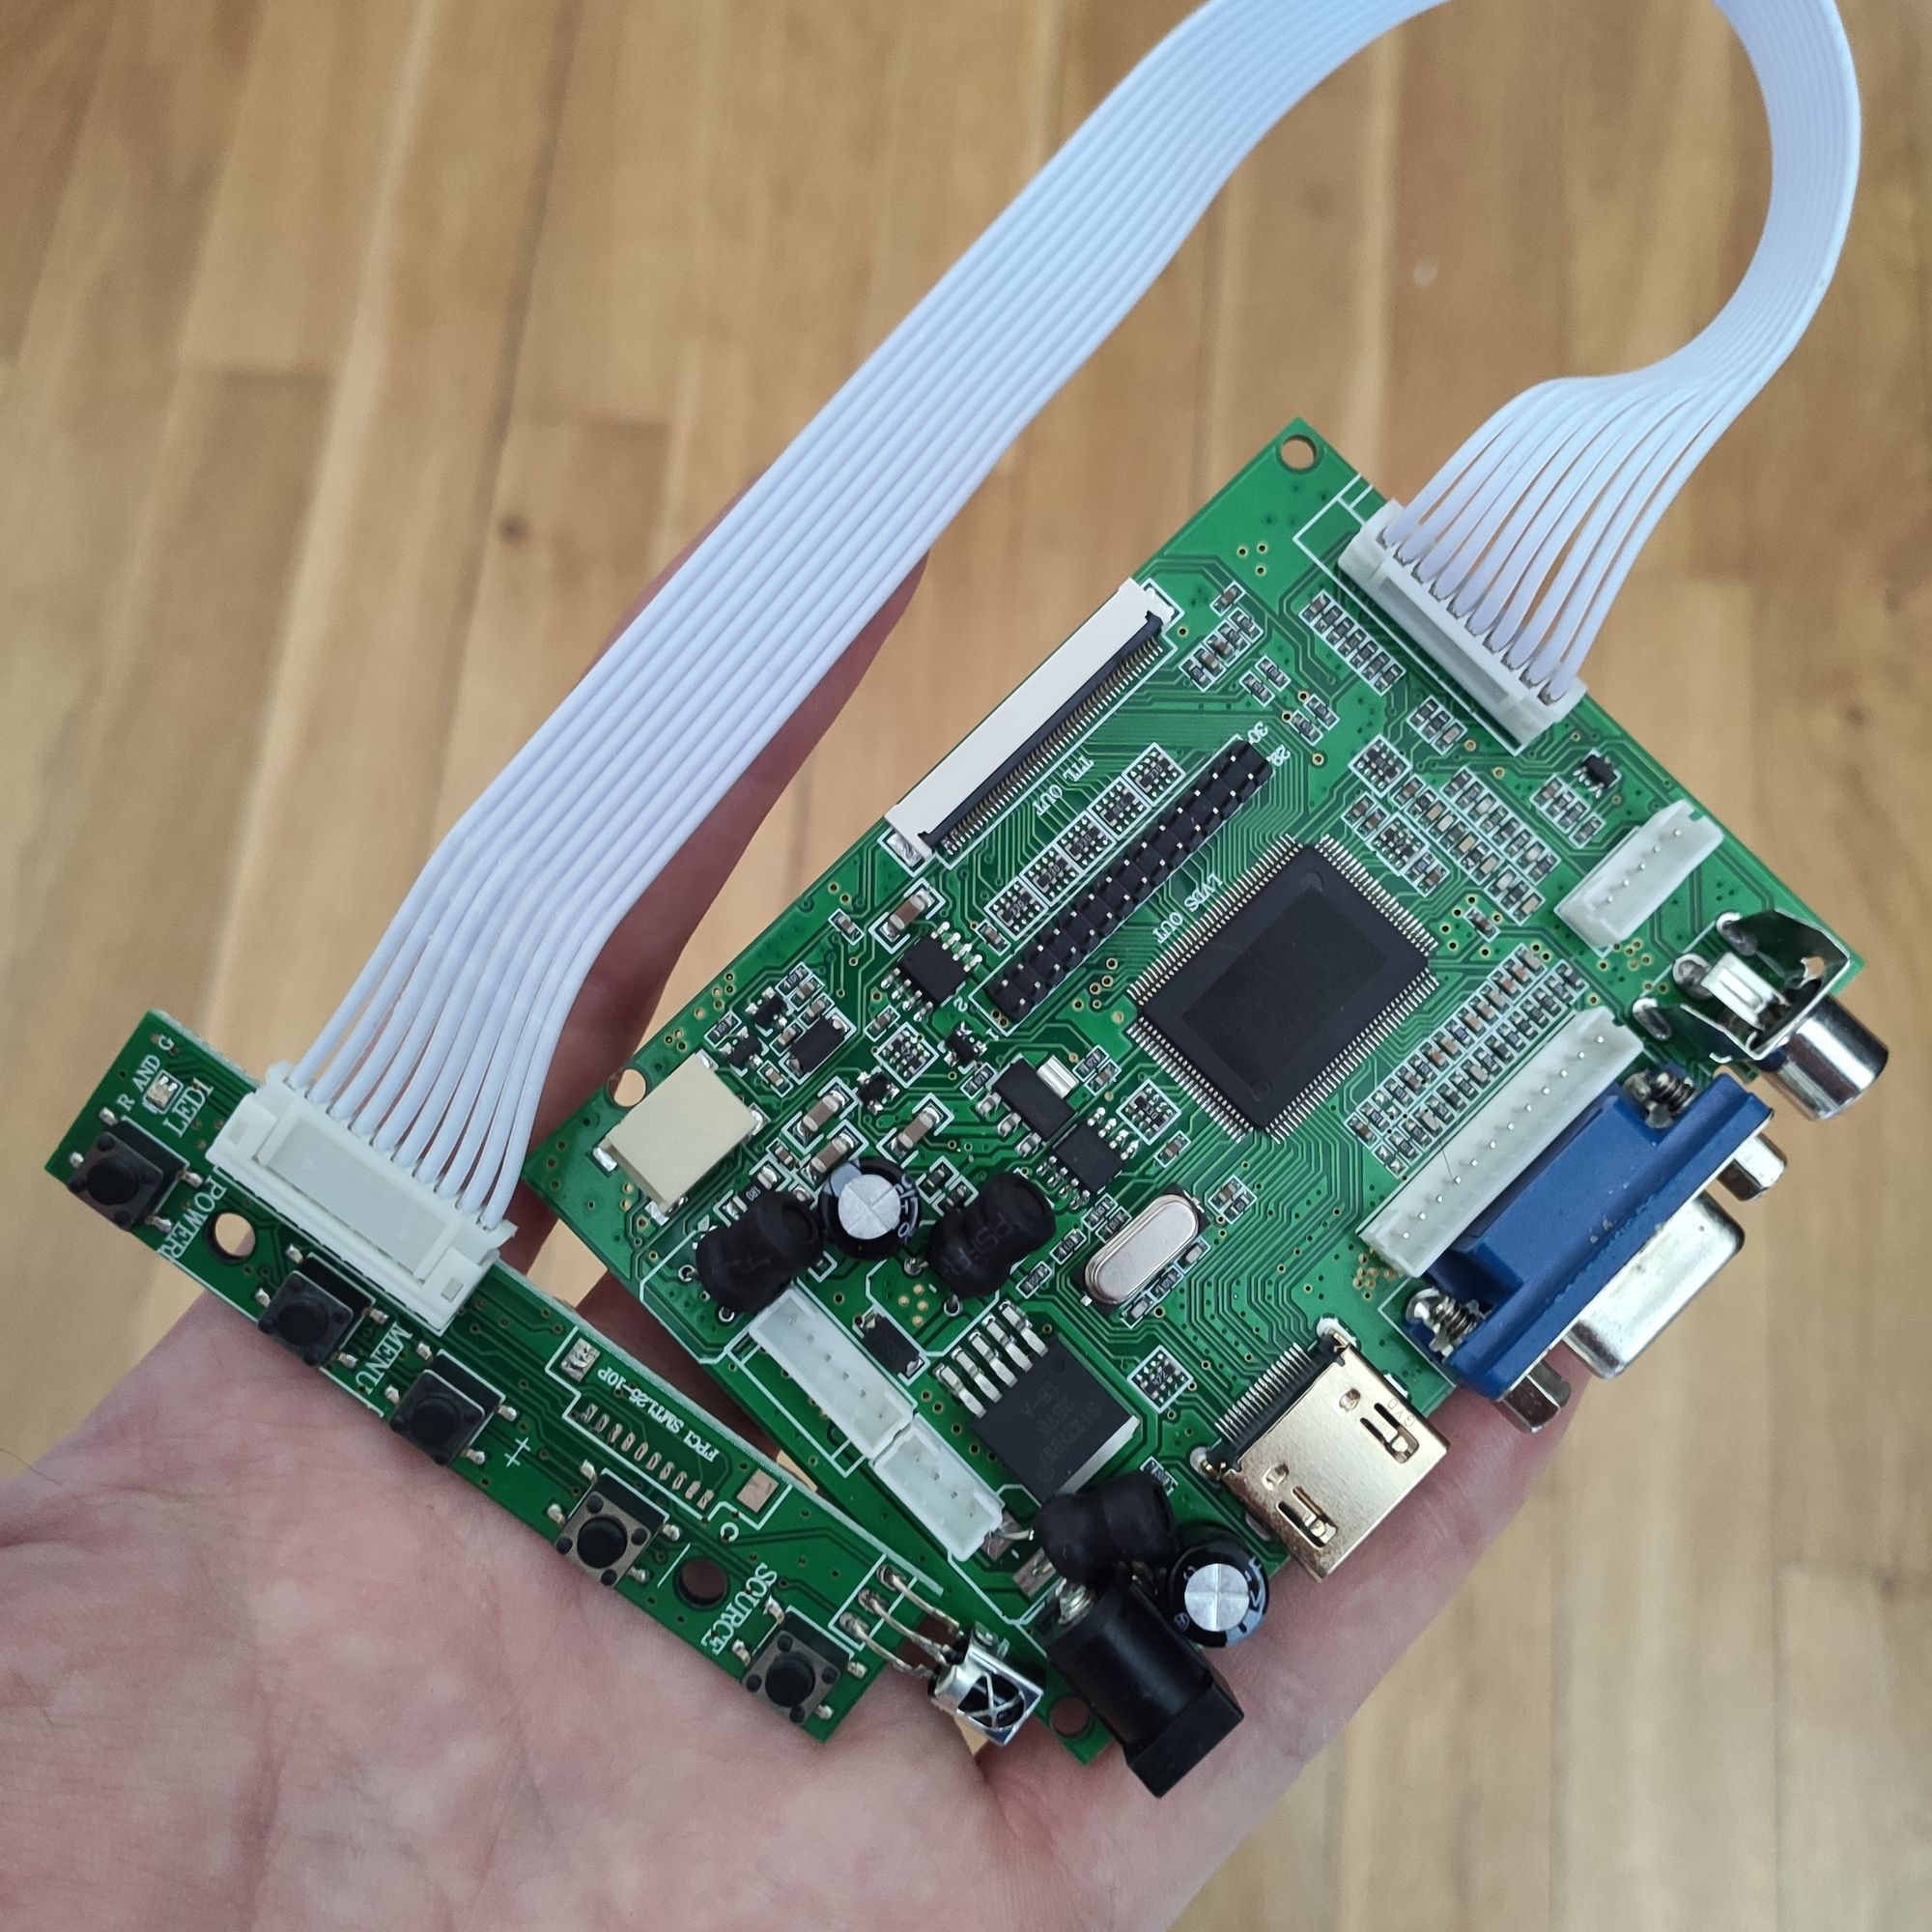
I discovered that this type of screen can be driven by a cheap controller board, a "VS-TY2662-V1" (or also called PCB800099) for less than 15€ on AliExpress.
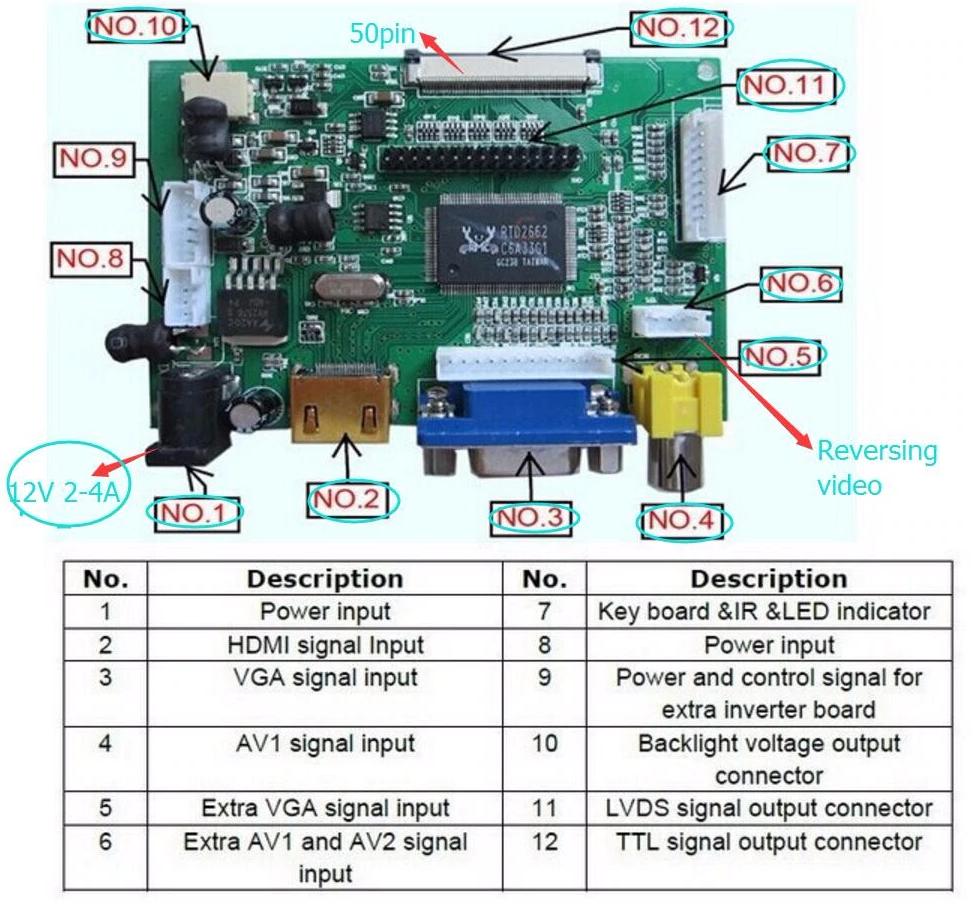
My screen has a TTL 50 pins interface.
The controller can be powered by a 5V power supply.
Sadly I bought a board without understanding that the board is specific to the LCD screen resolution. The board that I got seemed more configured for a 800x480 LCD screen, far from the 1024x600 screen that I got. The screen was unusable as is.
Flash options
I tried to find a way to update the firmware of the board, and discovered that I wasn't the first one to try.
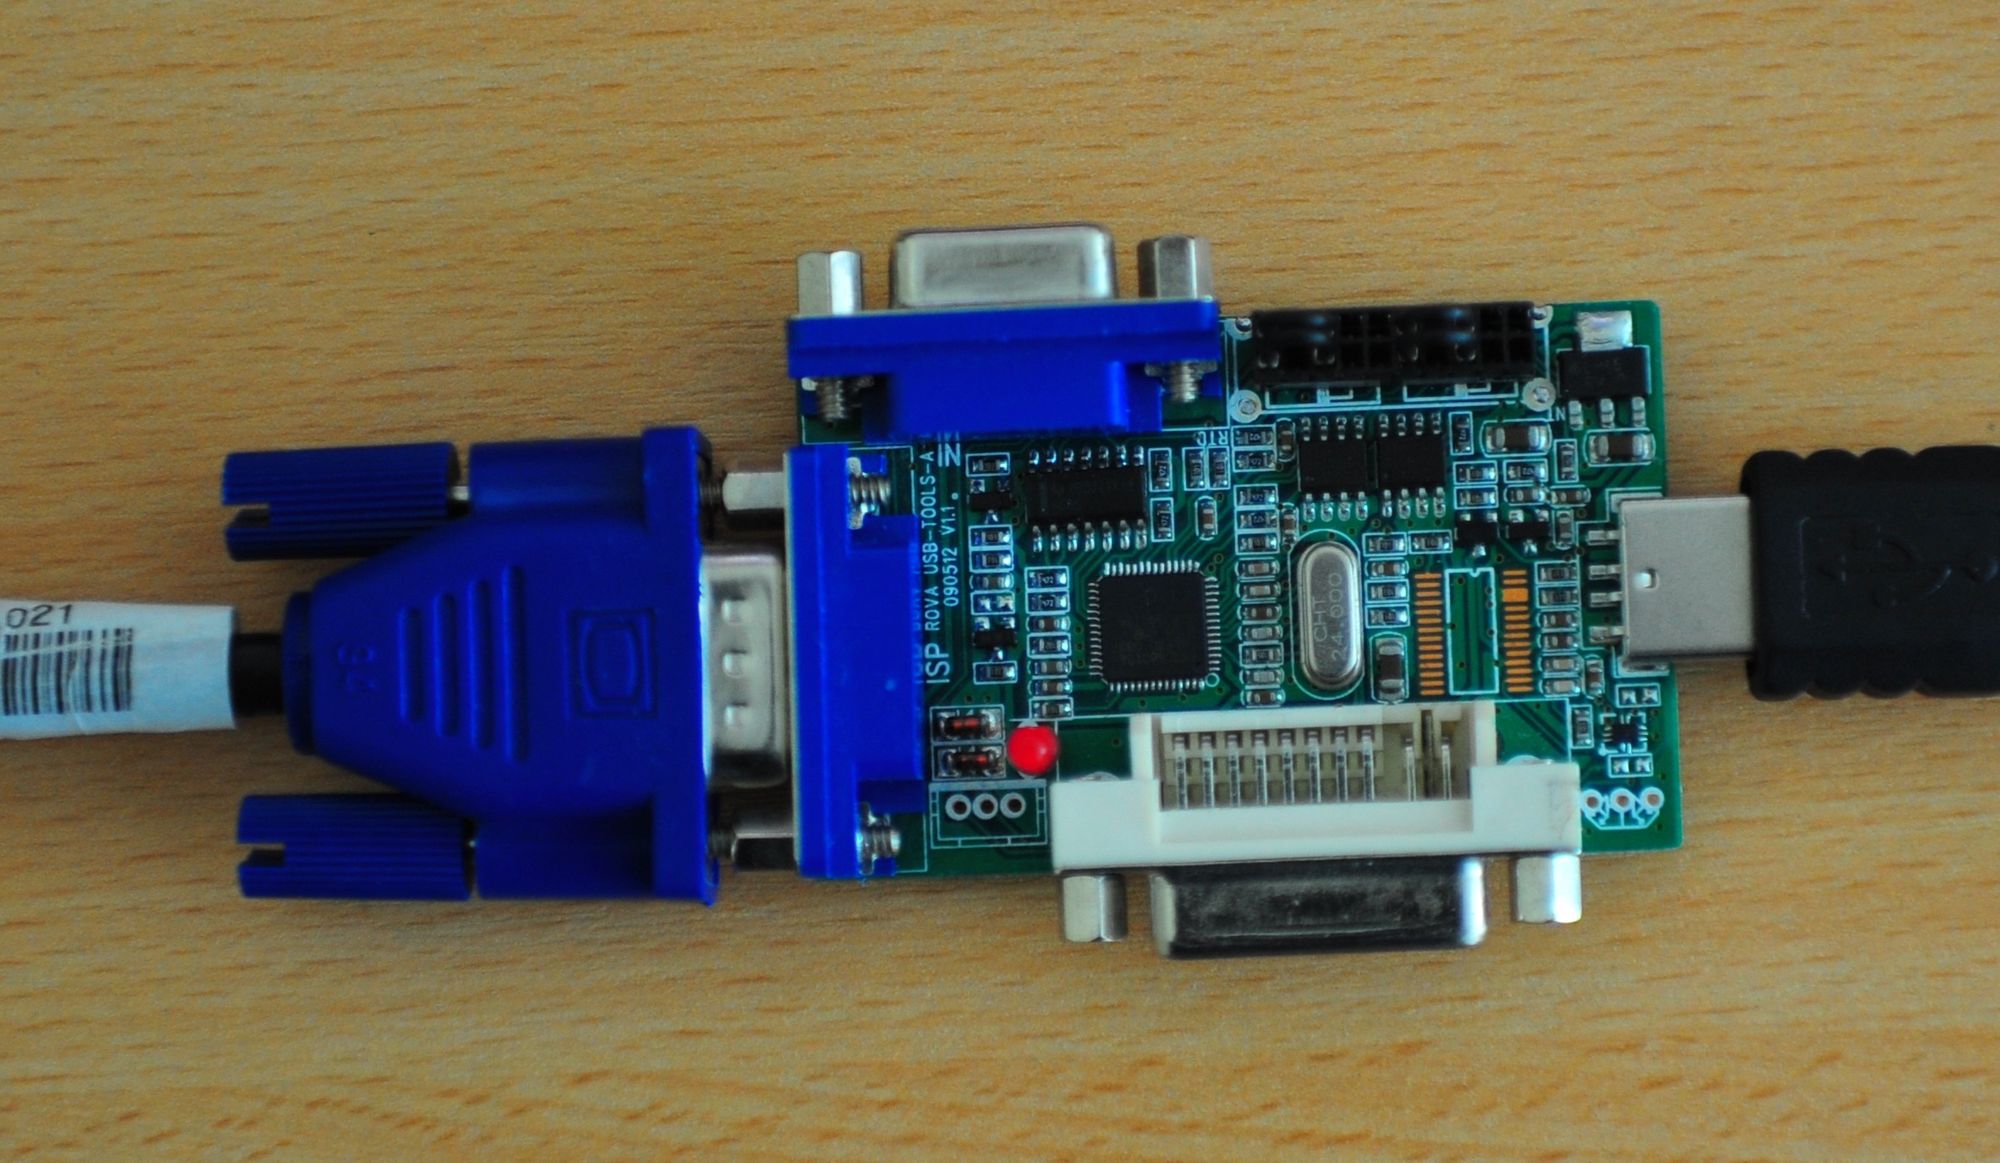
The controller has an I2C port, which can be used to flash a new firmware.
One "easy" way to do it is to by a specific adapter and a software called ROVATOOL, but it costs more than 15€ and I don't think I will be using it more than once...
An other way to do it, is to use an Arduino sketch, reading / writing on an SD card thanks to a micro-sd card reader. I tried it: epic fail. After checking that the SD card reader was successfully linked to the Arduino, and the controller , the sketch was failing as soon as the SD card "open" function was called in the source code (even without being executed!).
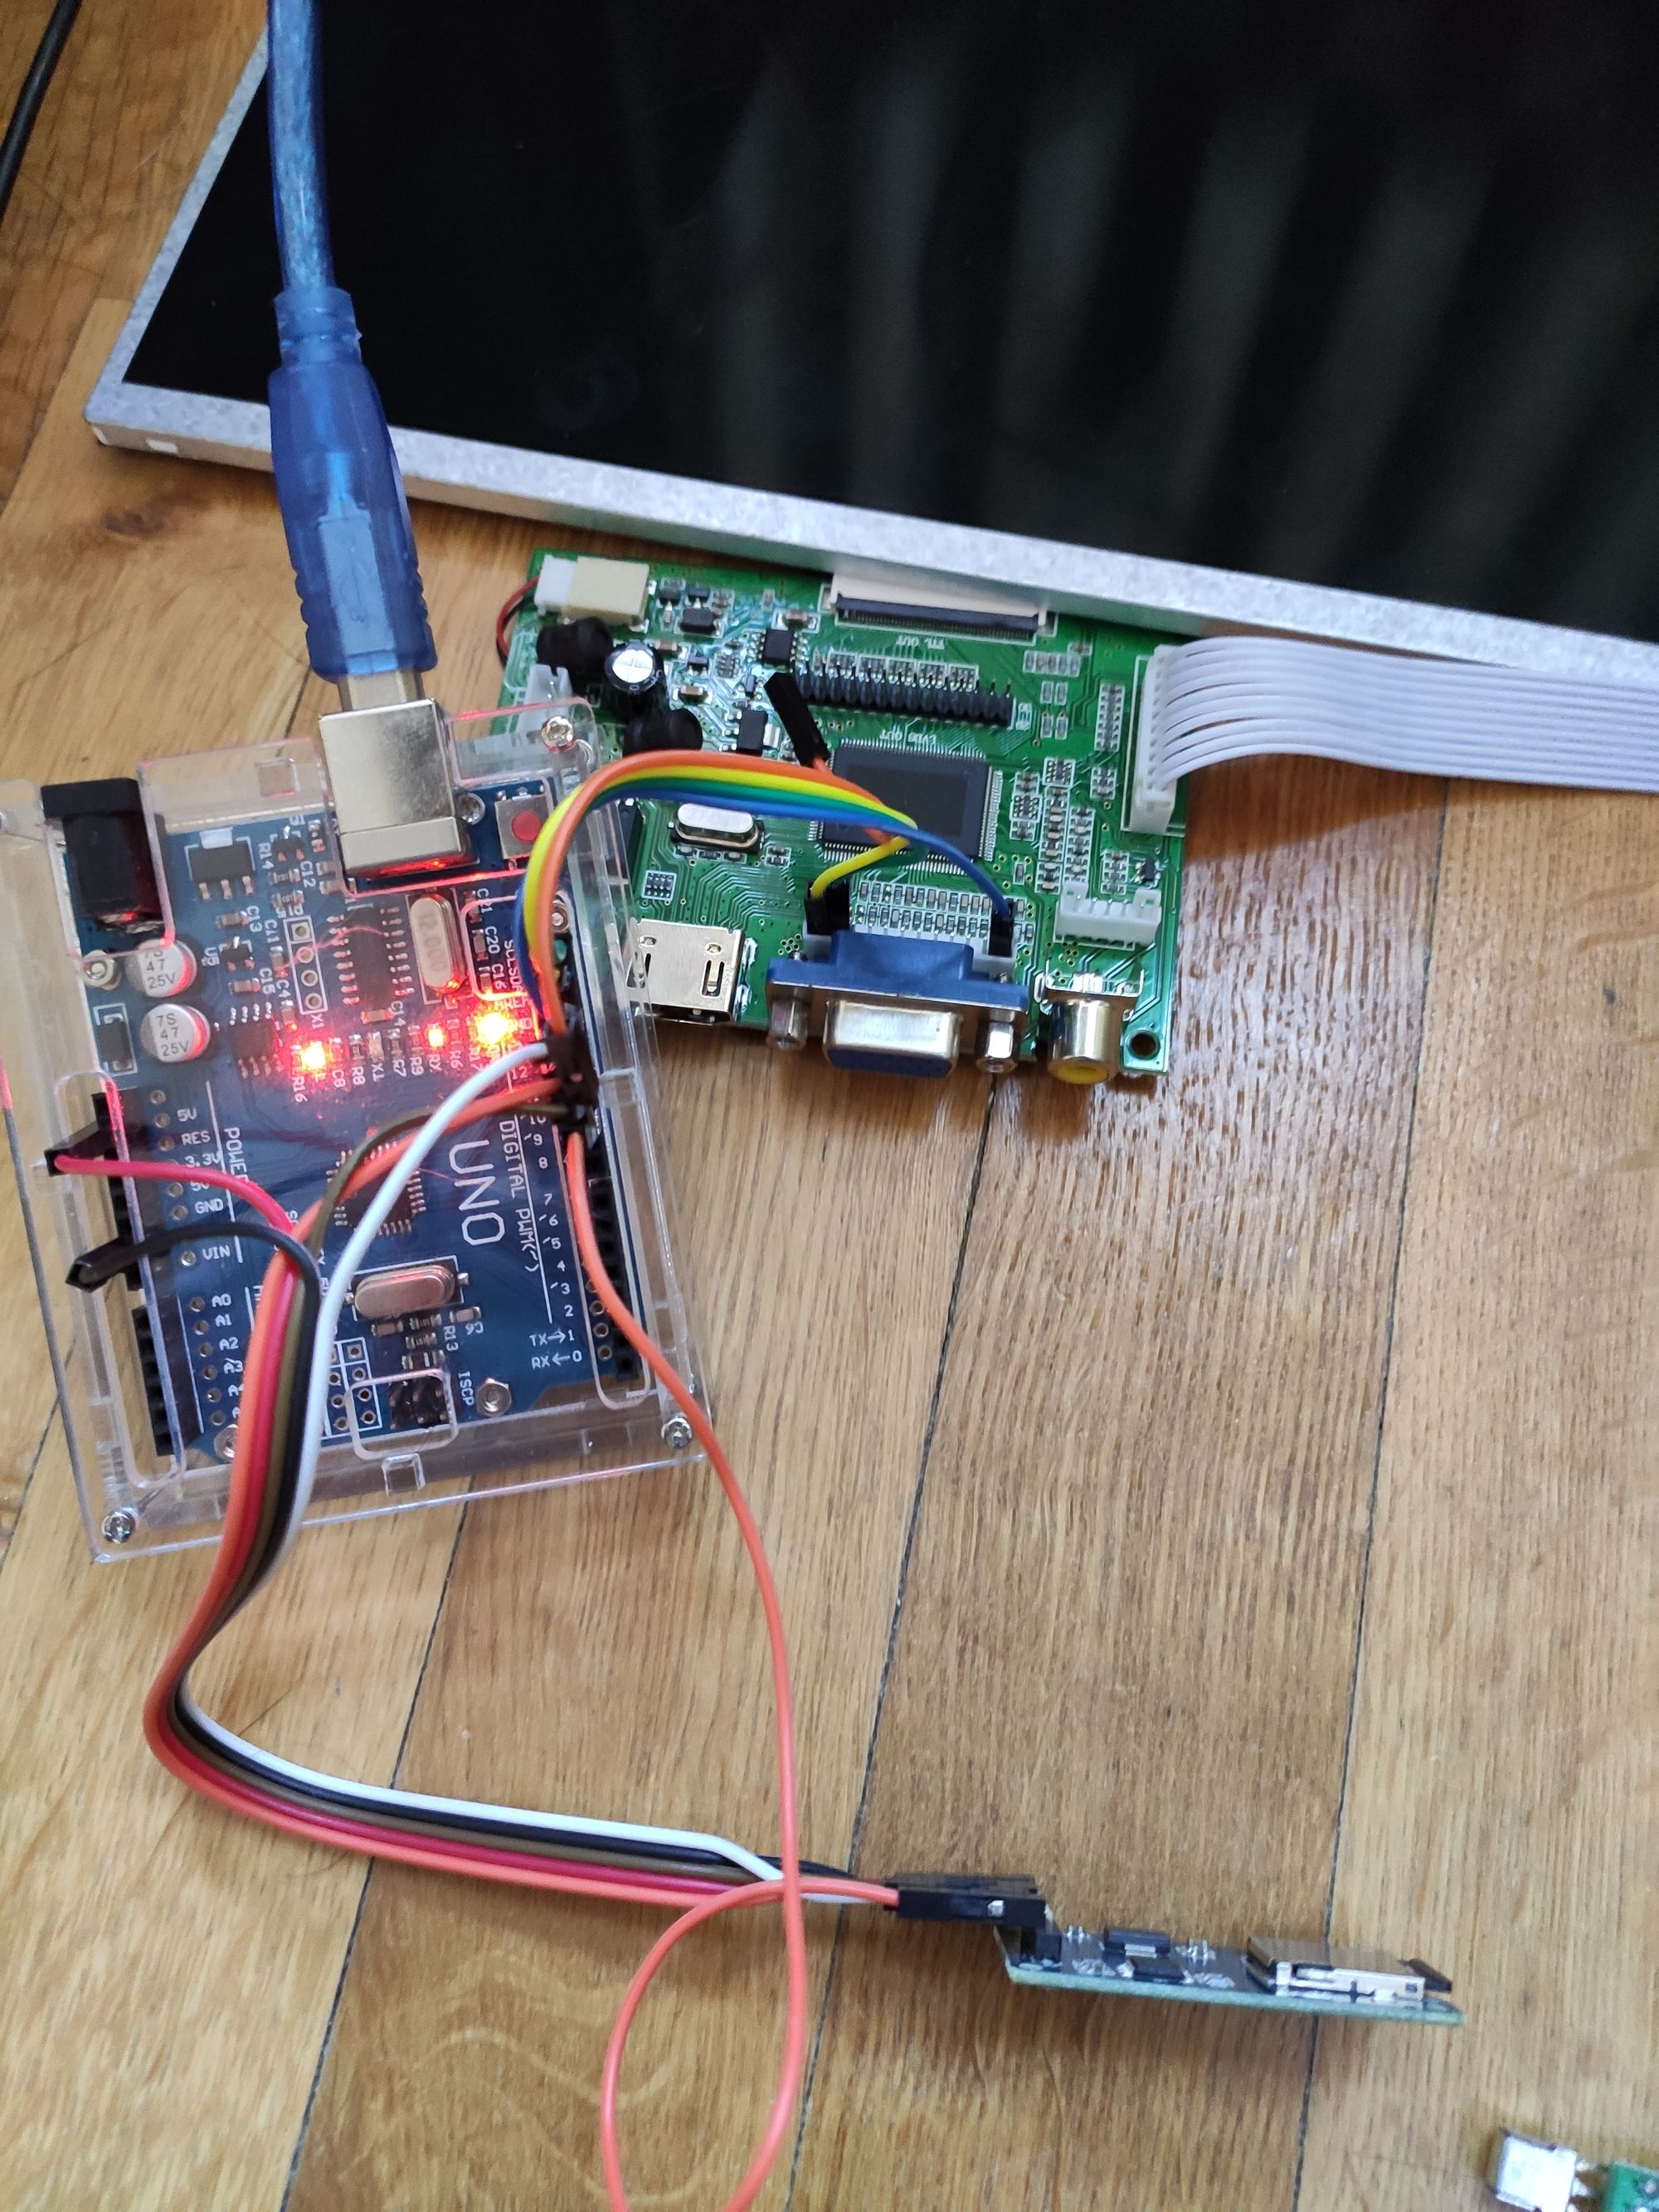
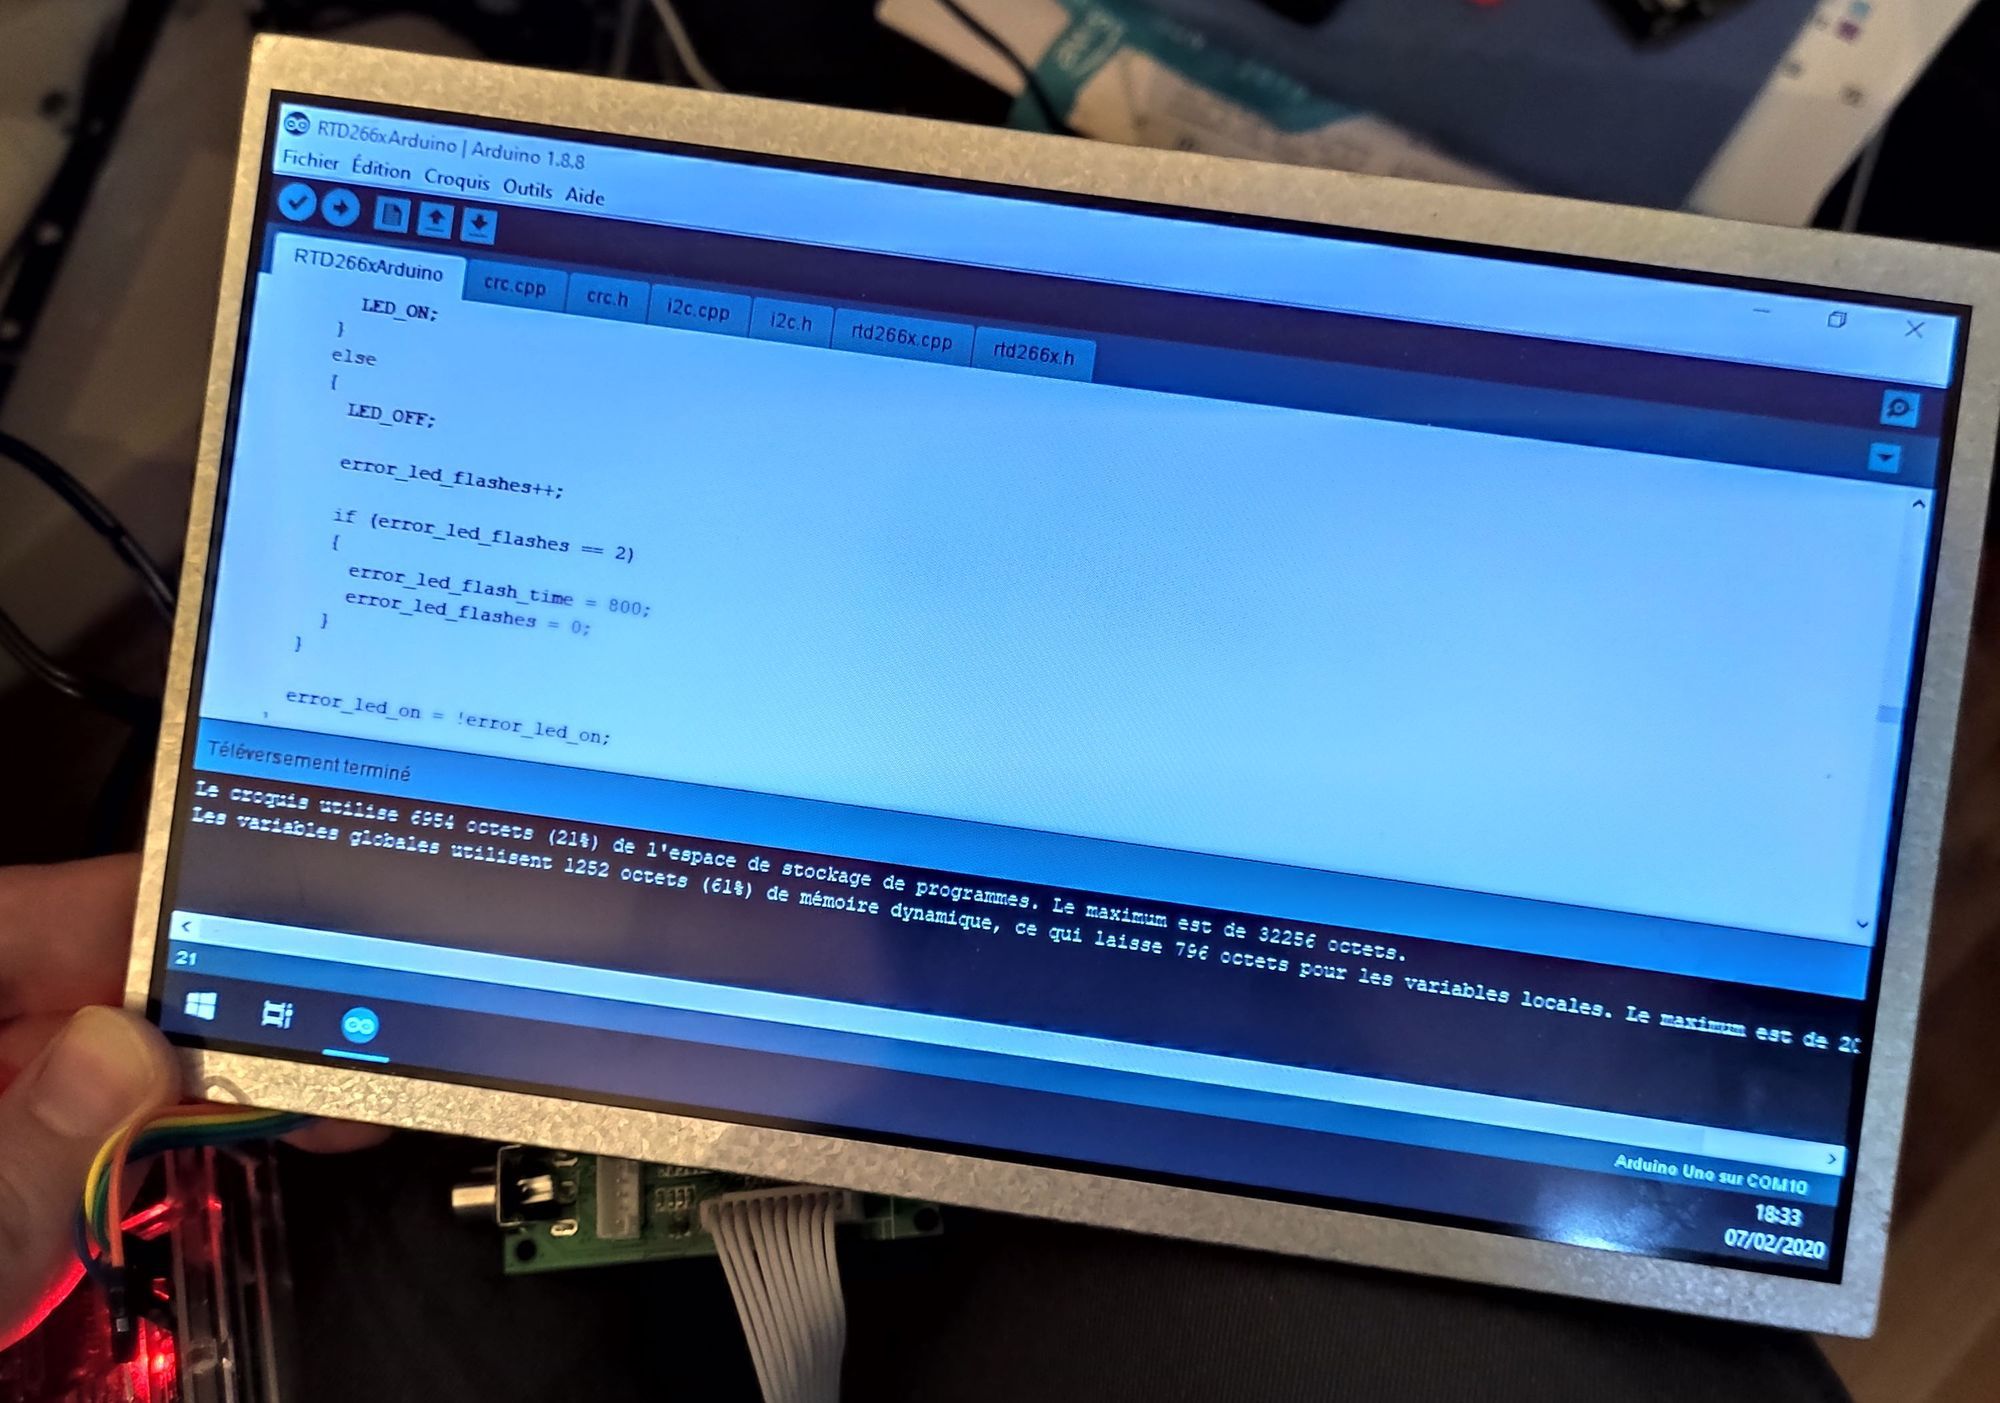
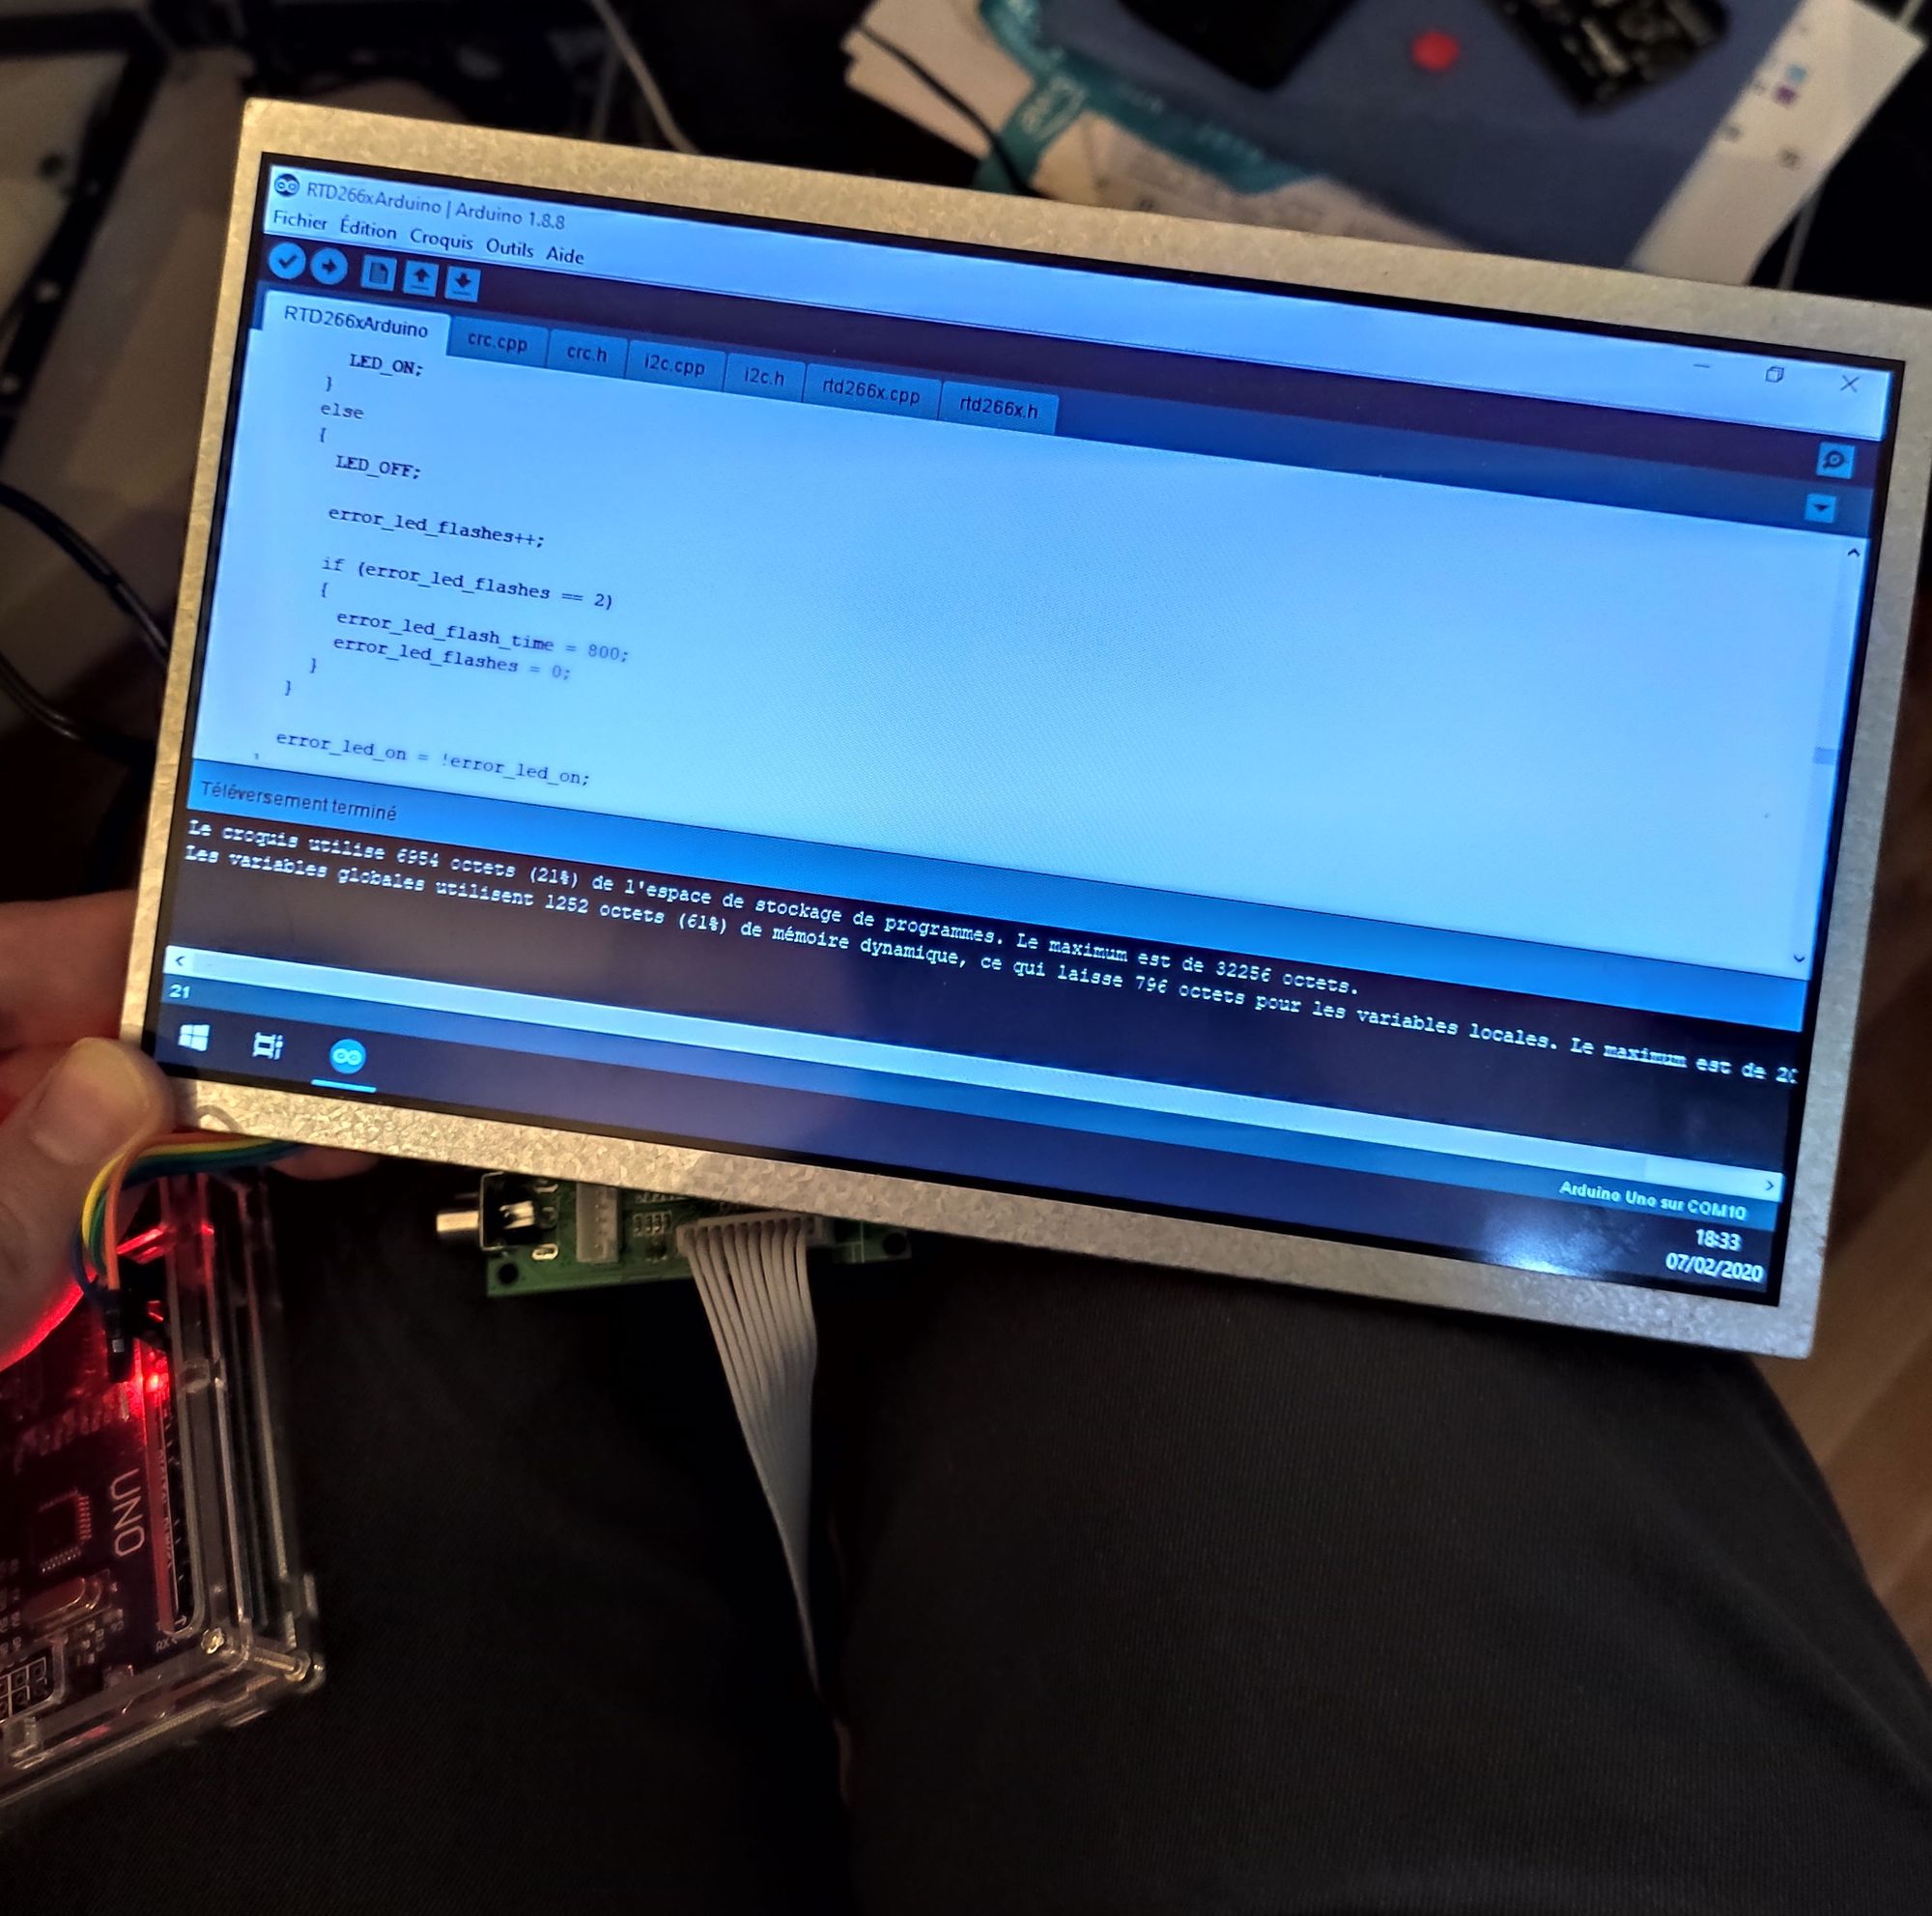
I found an easier solution. It requires an Arduino (Uno in my case), and a Windows software.
The Arduino is loaded with a custom sketch, and is linked to the I2C port of the controller. 3 wires (SDA, SCL and GND), that's it!
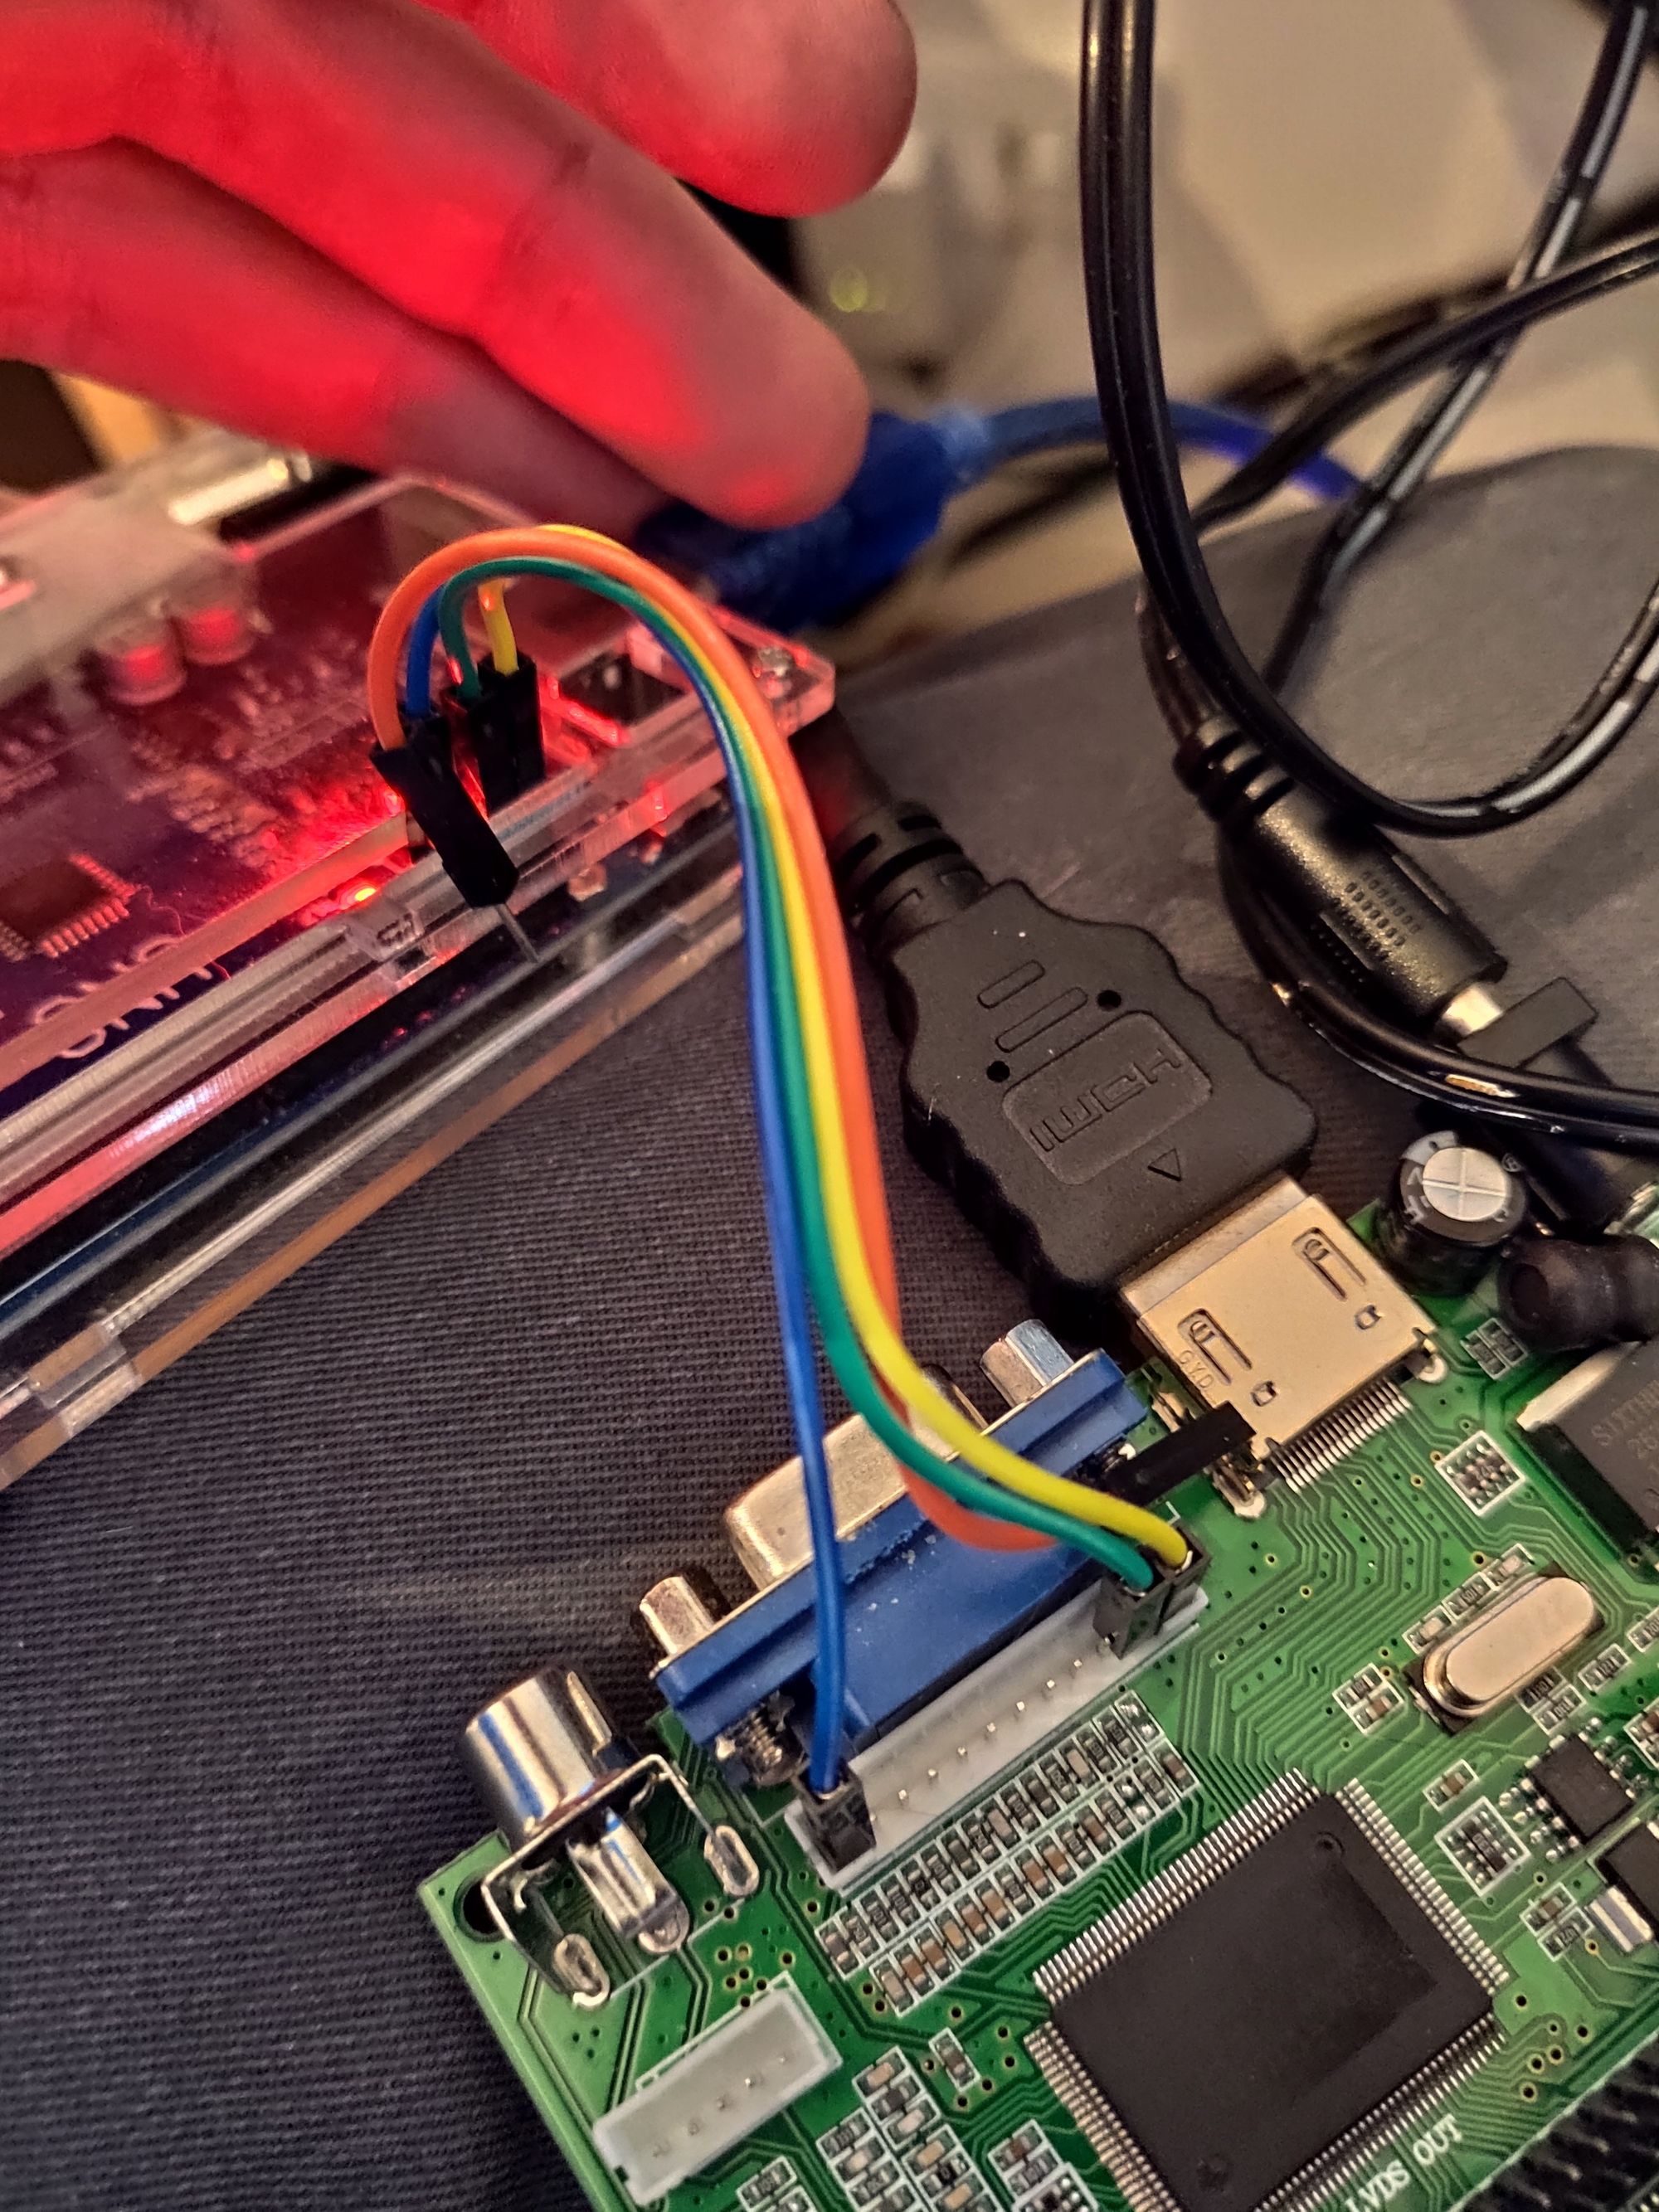
The controller pins are labeled on the back of the PCB.
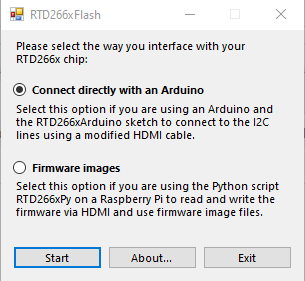
The Arduino acts like a Serial-I2C bridge over USB. The Windows software discuss with the Arduino to read or write into the PCB800099 memory.
Sadly, I didn't backup my firmware successfully. So no turning back!
I used the "expert" mode to flash the firmware.
Firmwares
I had some difficulties to find a valid firmware for my screen. You can find some source code for building a custom firmware, but it requires a Kiel licence, and I didn't want to spend some time configuring building a custom firmware.
Instead, I found a GitHub repository which contains a lot of binaries.
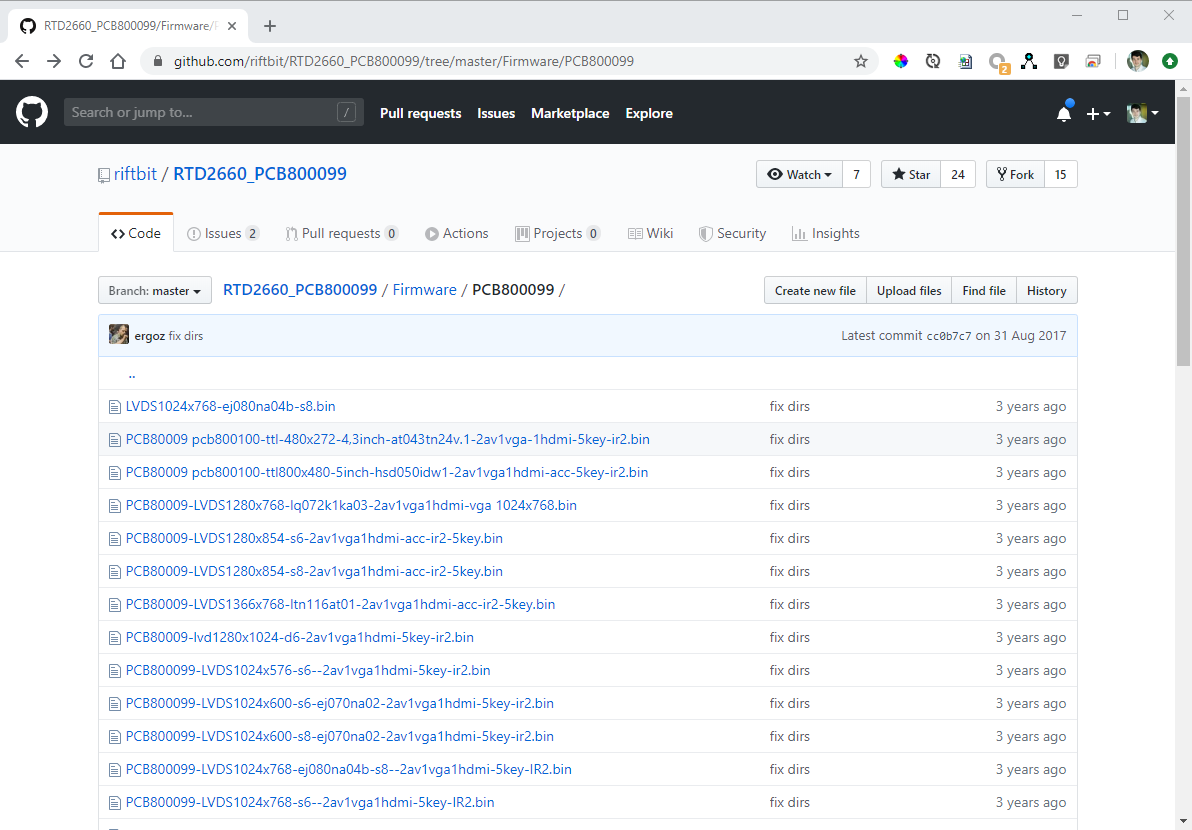
I ended up downloading the file named "PCB800099-ttl1024x600-24bit-at080en01-2av1vga1hdmi-5key-IR2.bin".
Let's flash it!
I checked the connection between the Arduino and the controller with the "Read status button":
Connecting...
Connection successful!
Reading status info... done
Manufacturer ID: 0xC2 (Unknown)
Device ID: 0x12 (Unknown)
JEDEC Manufacturer ID: 0xC2 (Unknown)
JEDEC Memory Type: 0x20
JEDEC Capacity: 0x13 (Unknown)
Status: 0xFF1C
Then, I selected the file in the RTD266xFlash software, and clicked on "Write"...

It takes about more than 1 min to flash the device, but it works!
After rebooting the screen, I plugged it to my PC HDMI output, and I had a third screen! I had to create a new 1024x600 resolution (with the NVidia software), as Windows recognized it as a 1024x768 screen.
I will now try to create a standalone screen with an OrangePi or an old never used Pine64...