Flashing ESP8266 NodeMCU Devkit with NodeMCU
The NodeMCU board is the way to go to begin WiFi projets. Flashing it witht the NodeMCU core open a new world of possibilities!
When I received my first NodeMCU DevKit, it was not flashed with any NodeMCU version. Even if it was, it's better to use a custom firmware, built for your application.
Because an ESP8266 is quite limited in flash and heap, it is a good practice to only embed the functionalities you will use.
So, no rush, better read the documentation and the goal of each module before going further.
Let's build our NodeMCU firmware !
... but without installing any development environment !
You can do that thanks to this website.
You can choose the branch to use for your firmware:
- Master: stable version
- Dev: more functionalities but maybe with more bugs than the master branch
After that, you can choose which modules you want to include in your firmware, and if you want SSL or not.
Once you selected your option, and entered your email address, you can press the "Start your built" button. You will receive an email few seconds later, with two links: the "integer" and "float" version. If you don't need float operations, stick with the "integer" version to save some space.
Time to flash
It's quite easy to flash the NodeMCU Devkit board.
- Plug-it to your computer with micro-usb cable
- Install CP2102 drivers if necessary
- Download ESP8266Flasher
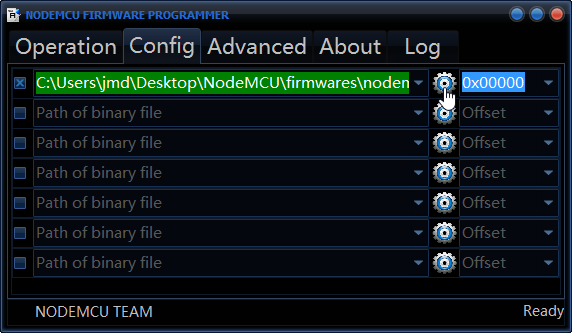
- Run the binary "ESP8266Flasher.exe"
- In the "Config" tab, select your binary on the first field
- In the "Operation tab", select the COM Port of your NodeMCU board if necessary
- And click the "Flash" button
- Wait few secondes... and that's it !
Next step ?
Now that you flashed NodeMCU on your development board, it's time to write some sketches :)