Arduino Pro Mini: Power consumption
Building a low power consumption project is not easy for a hobbyist. The Arduino Pro Mini is a good option but requires some tweaking!

With my low-power objective, I had to try to find ways to save power. For that, I tried different solutions to custom the Arduino Pro Mini.
Important remark
As I'm doing all this as a hobby, I don't have the appropriate measuring devices.
The goal of this post is not to procure accurate measurements but only to compare the consumption of my device with different tweaks.
Presentation
I made the measurements with two Chinese clones of the Arduino Pro Mini 3.3V 8MHz.
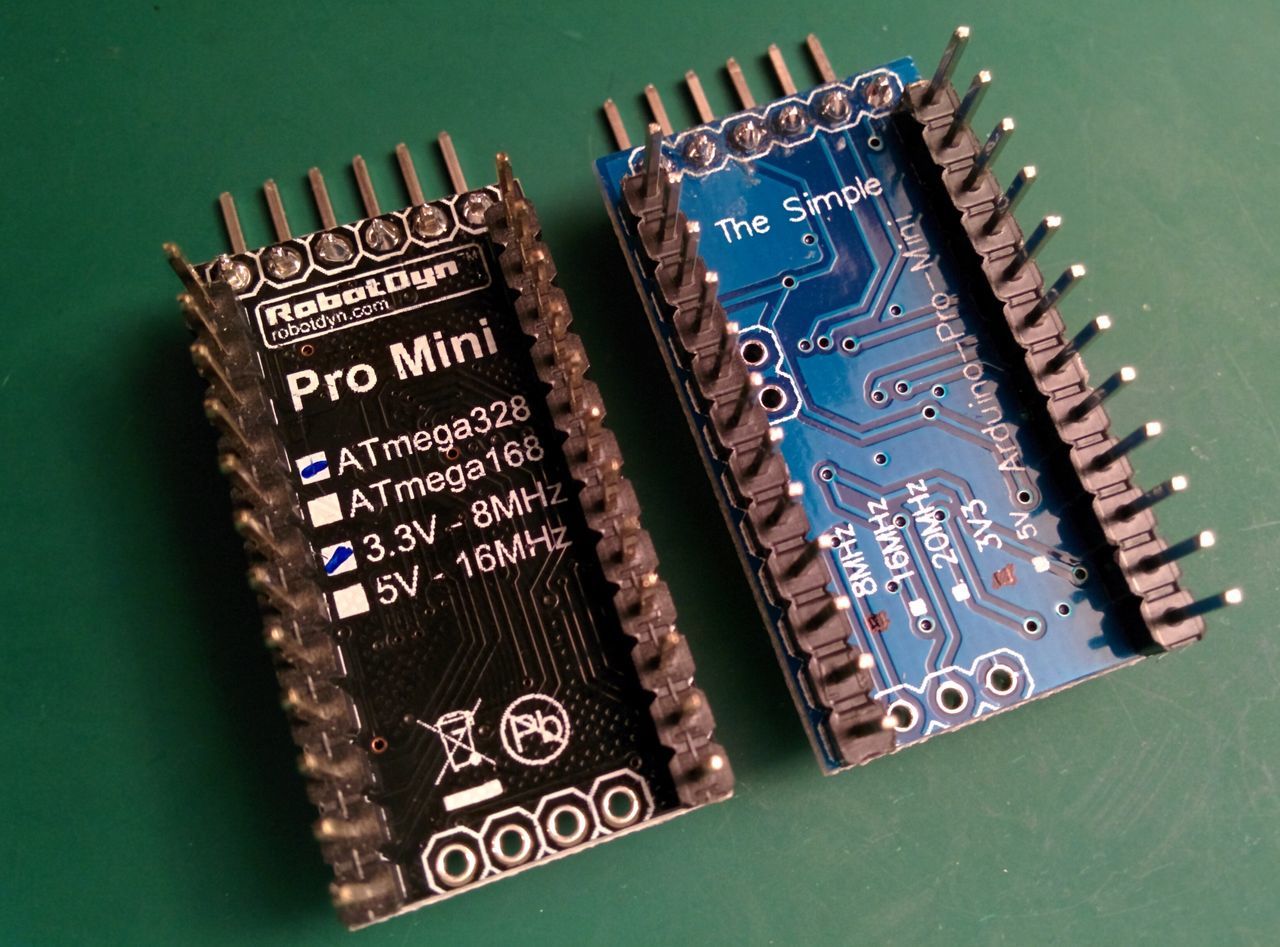
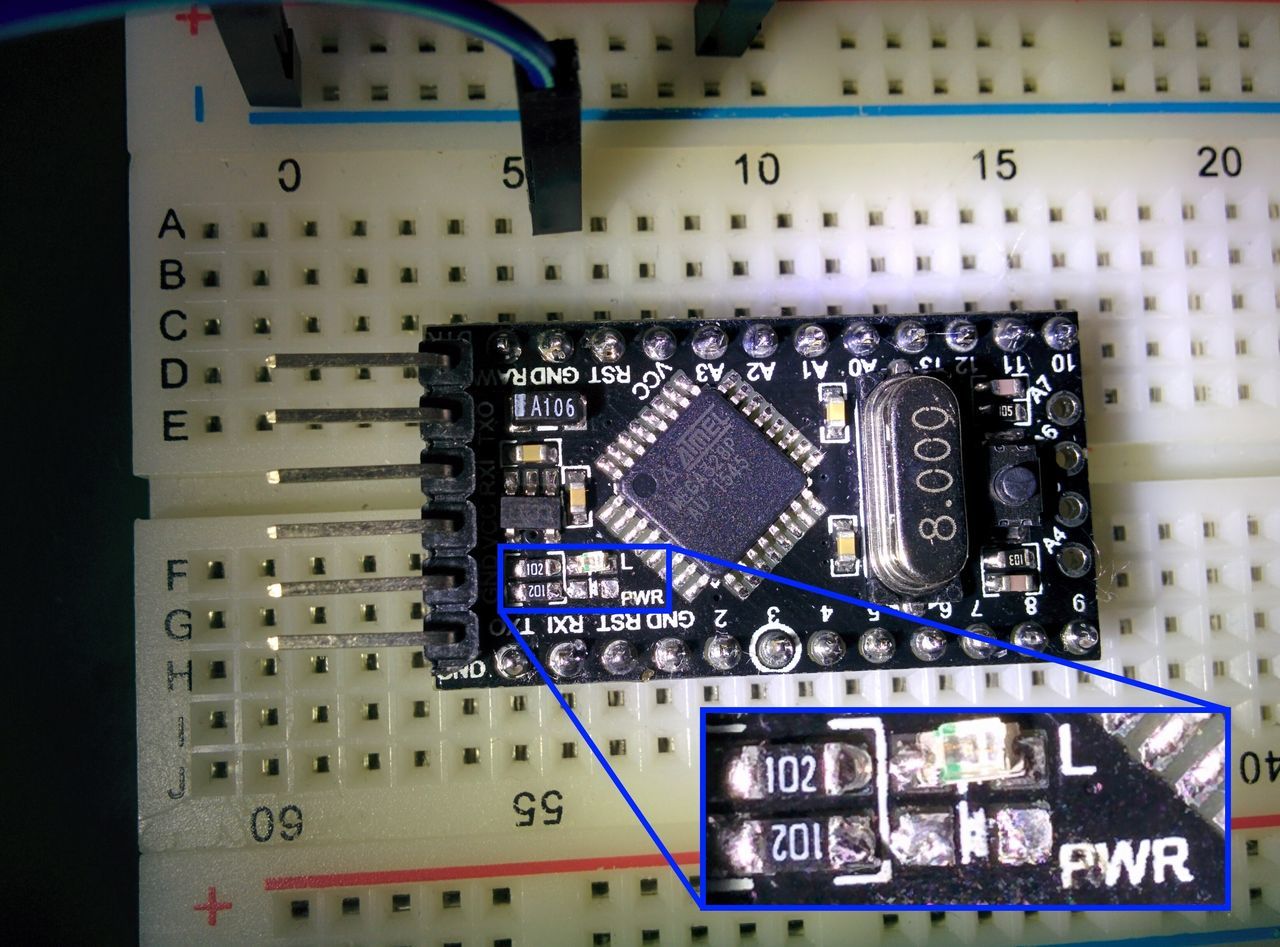
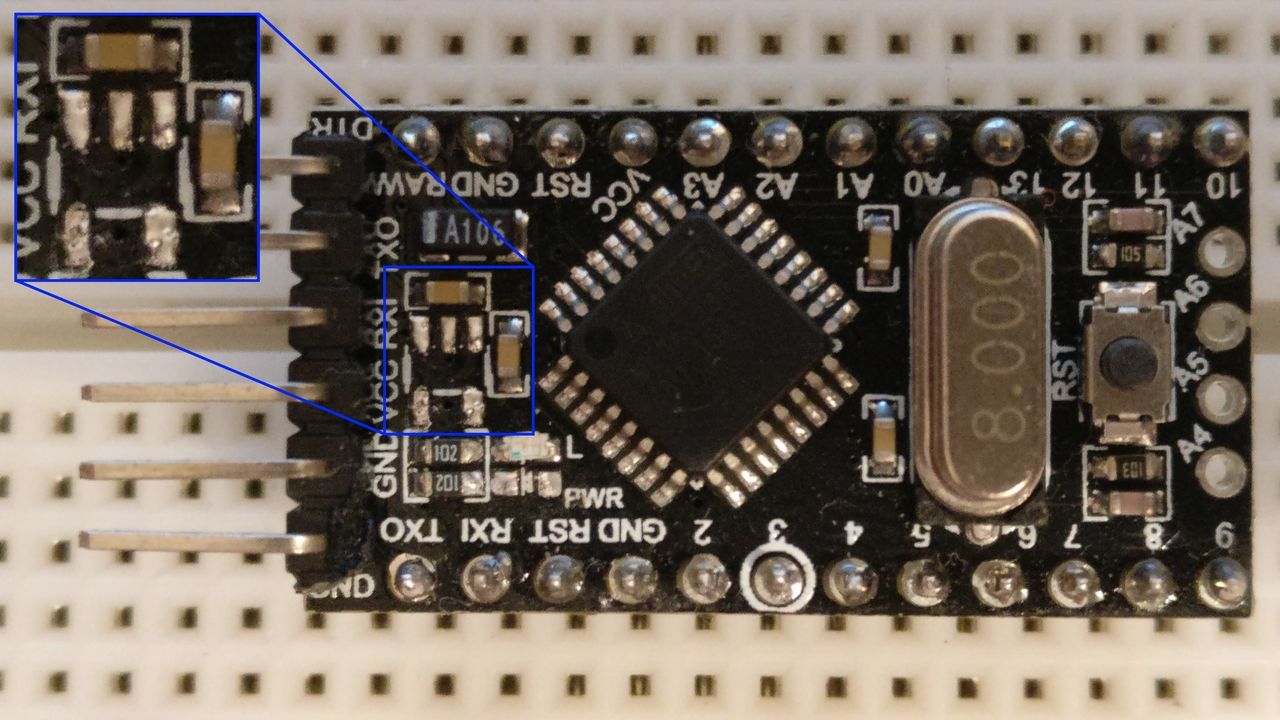
- Arduino Pro mini 3.3V @ 8Mhz "RobotDyn", in black, cheap and well finished;
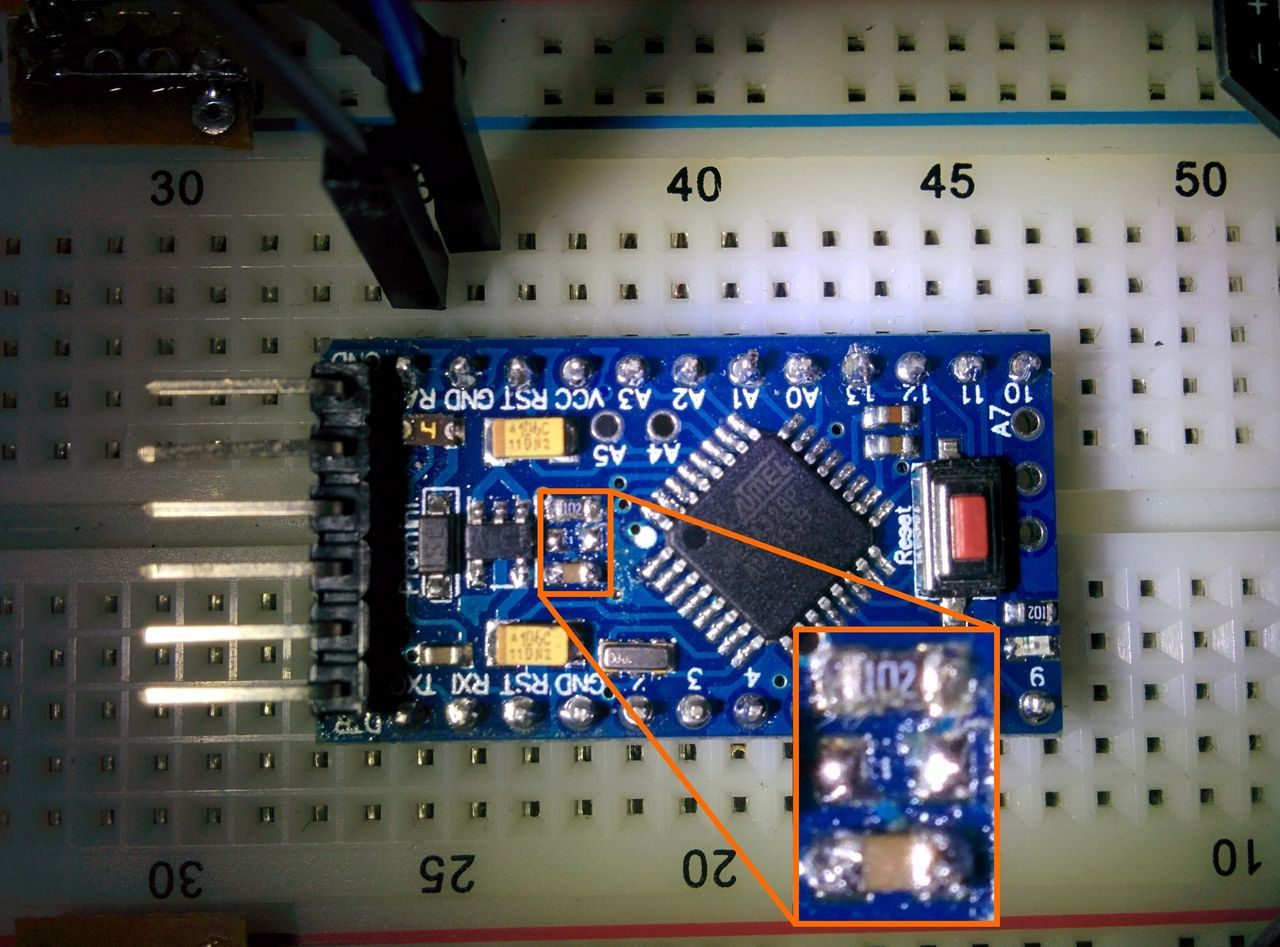
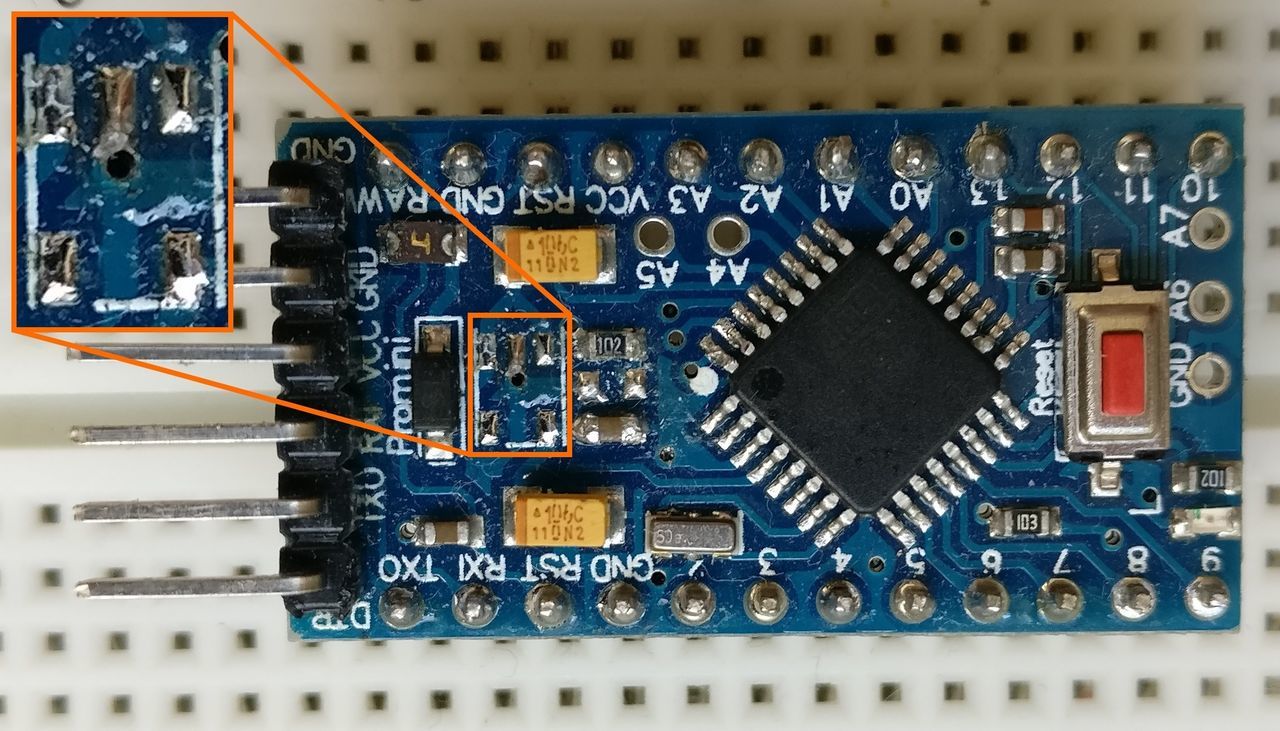
- Arduino Pro mini 3.3V @ 8Mhz "The Simple", in blue, the most common clone on the Internet (cheapest).
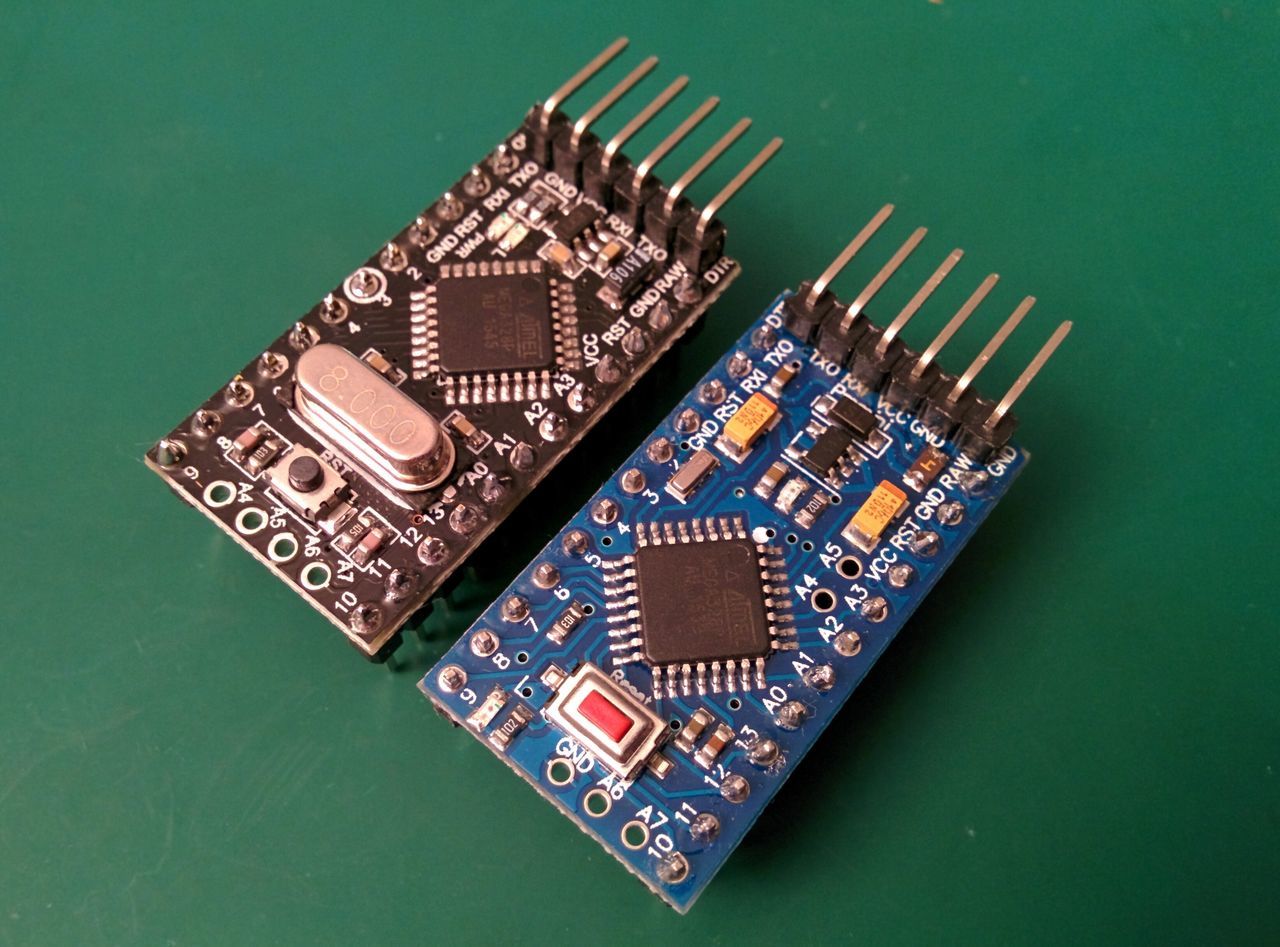
Remark: The serial pins (at the top) are not in the same order on the two boards.
Remove the power LED
It was my first attempt. And sadly, I read somewhere that cutting a trace on the board was working... It was not a good idea ! After that, I was unable to program the Arduino anymore.
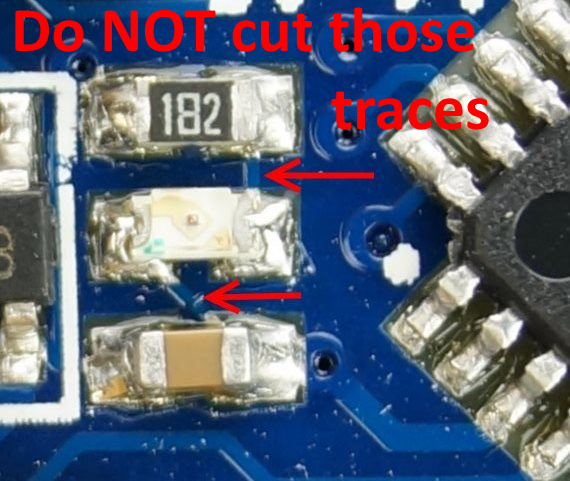
To correct this mistake, I had to remove the LED, and make a small bridge with a small wire to restore the cut trace.
To avoid this, you should simply create a solder bridge between the two sides of the SMD LED (to be able to heat them at the same time), and push the led aside. After that, clean the area with a solder pump if needed.
I admit that I do not succeed at each time (sometimes, the LED burns under the effect of the heat).
RobotDyn
The simple
Remove the regulator
To go below 3.3V, you can remove the regulator. Moreover, it will save even more power.
RobotDyn
The simple
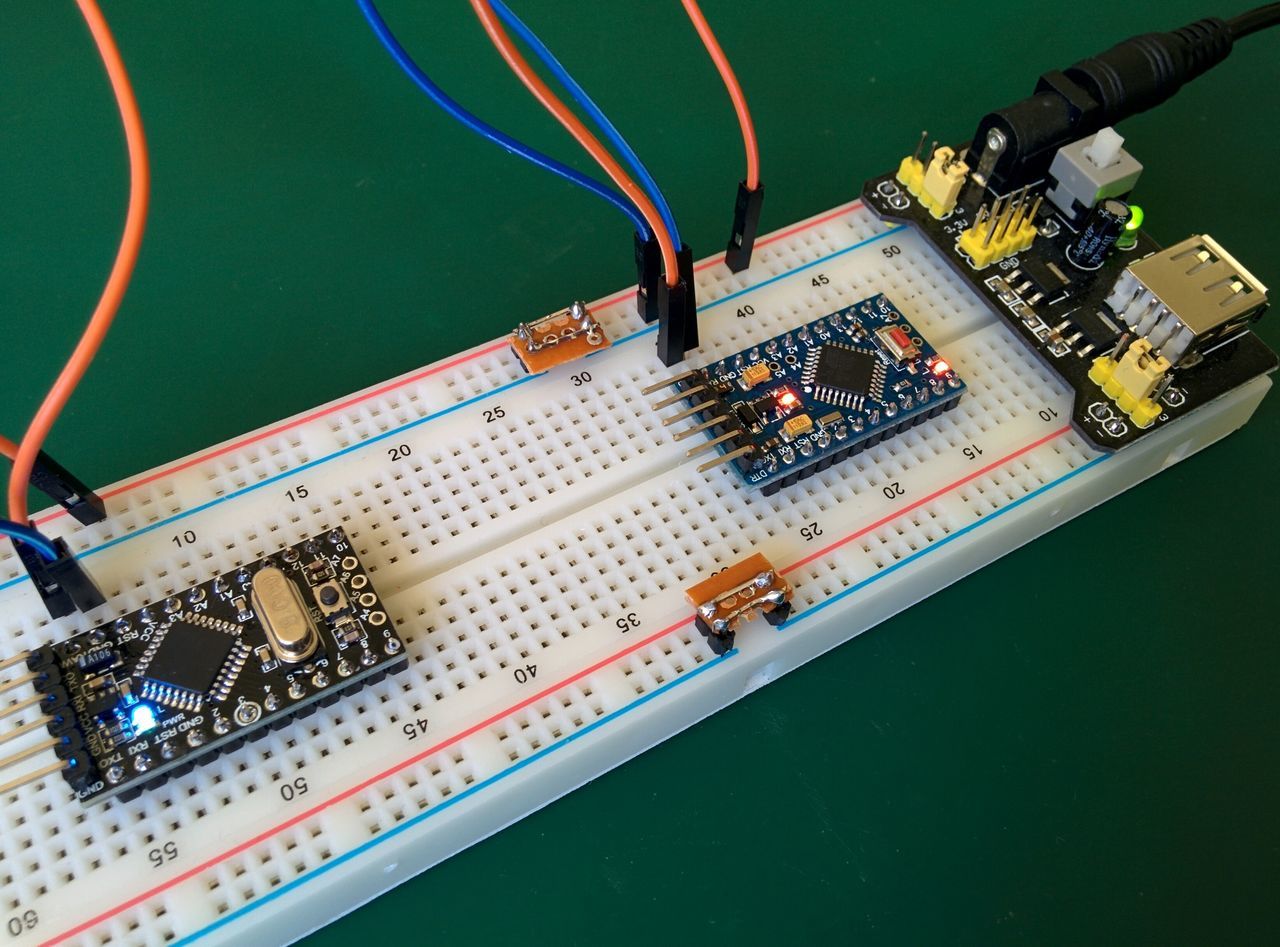
Measurements
Those measurements are made (without any programmer attached):
- with an empty sketch: ACTIVE mode
- with a sketch using the LowPower library: POWER DOWN mode
// - Empty sketch for 'active' mode
void setup() {
}

void loop() {
}
// - Sketch for 'power down' mode
#include "LowPower.h"

void setup() {
}

void loop() {
  // Sleep for 8 s with ADC module and BOD module off
  LowPower.powerDown(SLEEP_8S, ADC_OFF, BOD_OFF);
}
The simple @ 8MHz
| State | Input voltage | Power LED | Regulator | Consumption |
|---|---|---|---|---|
| Active | 3.3V on Raw pin | On | With | 4.29mA |
| Active | 3.3V on Vcc pin | On | With | 5mA |
| Power down | 3.3V on Raw pin | On | With | 1.152mA |
| Active | 3.3V on Vcc pin | Removed | With | 3.62mA |
| Active | 3.3V on Raw pin | Removed | With | 3.21mA |
| Power down | 3.3V on Vcc pin | Removed | With | 33.3µA |
| Power down | 3.3V on Raw pin | Removed | With | 31.7µA |
| Active | ==3.3V== on Vcc pin | Removed | Removed | ==3.72mA== |
| Power down | 3.3V on Vcc pin | Removed | Removed | ==4.2µA== |
RobotDyn @ 8MHz
For those measurements, supply the Arduino through the Raw pin or the Vcc pin doesn't change anything with the reliability of my measurement tools.
| State | Input voltage | Power LED | Regulator | Consumption |
|---|---|---|---|---|
| Active | 3.3V on Raw pin | On | With | 4.89mA |
| Power down | 3.3V on Raw pin | On | With | 1.40mA |
| Active | 3.3V on Raw pin | Removed | With | 3.62mA |
| Power down | 3.3V on Raw pin | Removed | With | 86.9µA |
| Active | 3.3V on Vcc pin | Removed | Removed | TBD |
| Power down | 3.3V on Vcc pin | Removed | Removed | TBD |
Lower voltage, lower frequency
As I said in a previous blog post, it is possible to use the Arduino Pro Mini at 1.8V, with a frequency of 1Mhz. This should reduce the power used in active mode and power down mode, and should allow me to power my devices with two AA batteries[1].
For that, I had to remove the power regulator (as explained before).
RobotDyn @ 1MHz
| State | Input voltage | Power LED | Regulator | Consumption |
|---|---|---|---|---|
| Active | 3.3V on Vcc pin | Removed | Removed | 952µA |
| Power down | 3.3V on Vcc pin | Removed | Removed | 4.2µA |
| Active | 1.8V on Vcc pin | Removed | Removed | 509µA |
| Power down | 1.8V on Vcc pin | Removed | Removed | 3.6µA |
The simple @ 1MHz
| State | Input voltage | Power LED | Regulator | Consumption |
|---|---|---|---|---|
| Active | 3.3V on Vcc pin | Removed | Removed | 905µA |
| Power down | 3.3V on Vcc pin | Removed | Removed | 4.3µA |
| Active | ==1.8V== on Vcc pin | Removed | Removed | ==479µA== |
| Power down | 1.8V on Vcc pin | Removed | Removed | ==3.8µA== |
Conclusion
Without a lot of work, it's easy to save power with the Arduino Pro Mini.
- In "Power down" state, running at 8Mhz seems to consume as much power as at 1Mhz
- However, in "Active" state, running at 1Mhz saves a lot of power (3.5mA to 1mA at 3.3V, and around 500µA at 1.8V)
- It is not possible to run at 1.8V and 8MHz. To be able to use the battery as most as possible, it is mandatory to run at 1MHz[1:1]
- The consumption of the two modules is quite the same (and my multimeter is quite cheap).
Now it's time to apply this method to the water tank project !