Compile Optiboot for Arduino Pro Mini (1Mhz / 1.8V)
Using the Arduino pro mini at 1MHz is great, but requires an ISP programmer. I built a bootloader working at this frequency to simplify developments.

In one of my previous post, I explained how to use the Arduino Pro Mini at 1Mhz and 1.8V.
Though this method works, it is mandatory to use the ISP programmer to change the active sketch.
[Update 2016-08-24: The post has been updated to use Arduino IDE toolchain as primary tools]
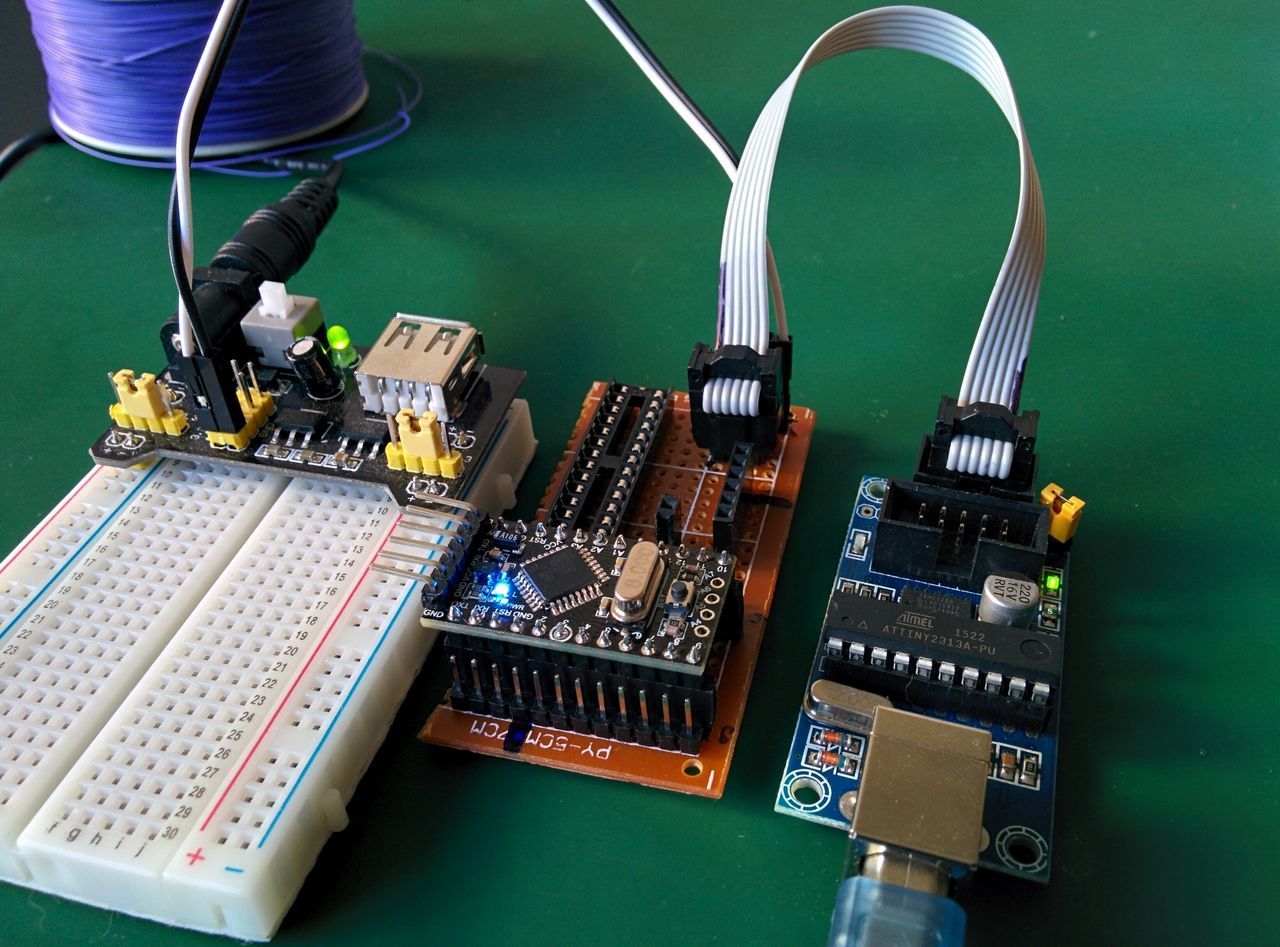
On the Arduino Pro Mini, the pins used by the ISP programmer are often also used by your project and not easily accessible (contrary to the Arduino Uno). However, the serial pins are located on the top of the board. It is easy to use them even when the board is at the center of large a project.
For these reasons, I want to be able to program my Arduino through the serial line, a bootloader is mandatory.
As I explained in a previous post, I didn't find any bootloader ready to use at 1MHz / 1.8V for the Arduino Pro Mini.
So, I tried to compile the "Optiboot" bootloader for the Arduino Pro Mini under Windows.
Actually, it is not as easy as written in the README file :D
Arduino IDE
To avoid downloading and installing a lot of tools, this blog post will use the Arduino IDE software. Please install it if you don't already have it on your computer.
Source code
First clone the Optiboot repository with git. For a stable revision, check the git tags[1].
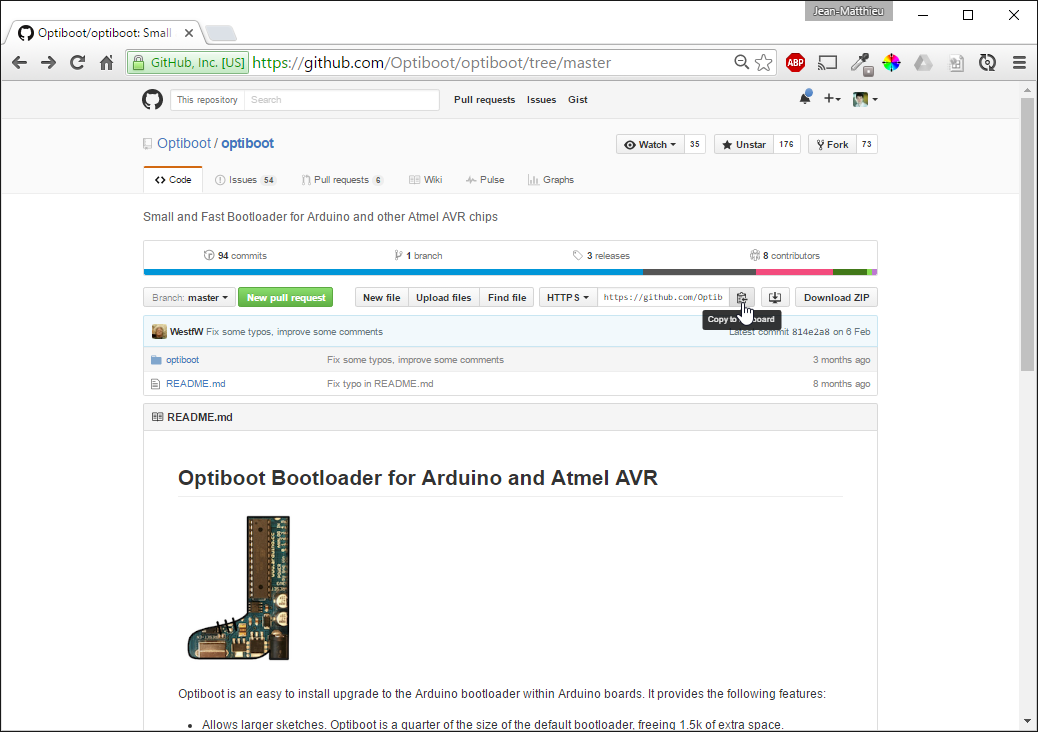
If you never used Git, take a look at the official documentation.
You can use the official git windows client.
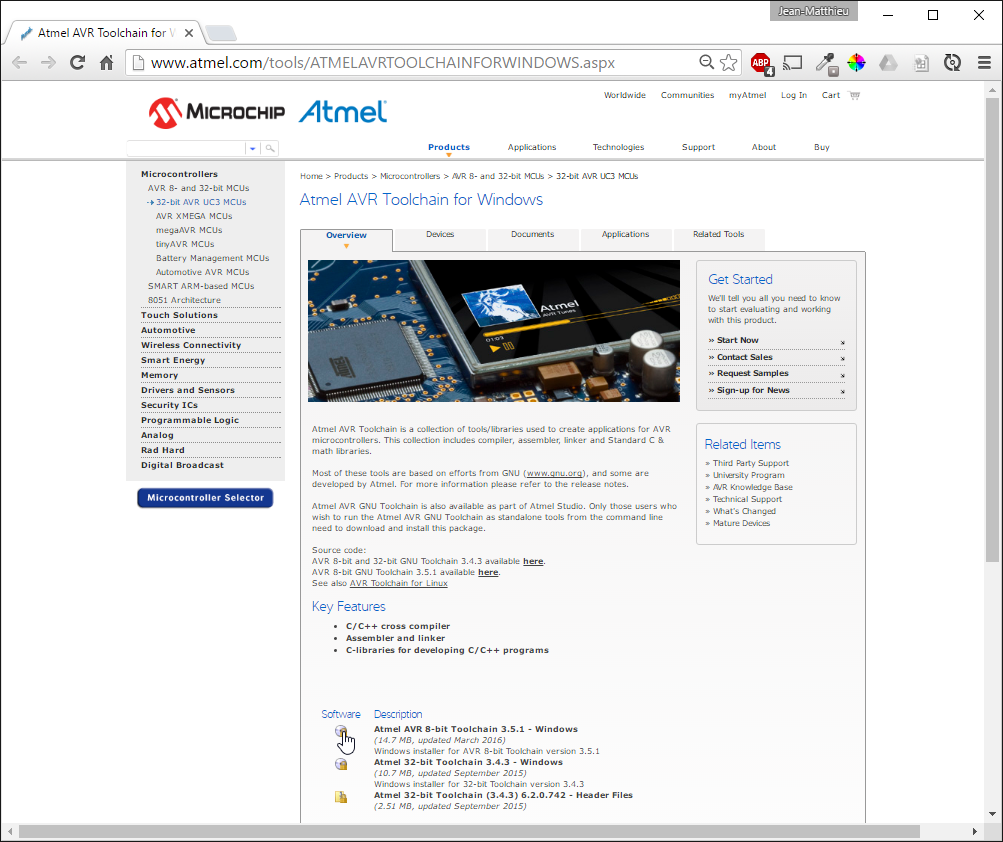
Atmel AVR Toolchain
For easier use, I advise you to use the Ardunio IDE AVR toolchain.
- Add the Arduino IDE toolchain to your Path (
C:\Program Files (x86)\Arduino\hardware\tools\avr\bin)
Remark: If you don't want to use the toolchain from the Arduino IDE, you can also download the windows software from atmel website : Atmel AVR 8-bit Toolchain X.Y.Z - Windows[2]
- Extract it on the the root of your hard drive (
C:\avr8-gnu-toolchain) - Add the "bin" folder to your Path (
C:\avr8-gnu-toolchain\bin)
Please note:
- The toolchain used in the Arduino IDE can differ from the Atmel toolchain (i.e. https://github.com/arduino/toolchain-avr)
- Another solution : use Platformio toolchain (
C:\Users\[user]\.platformio\packages\toolchain-atmelavr\bin)
AVRDude
If you used the AVR toolchain from the Arduino IDE, you don't have to install AVRDude: just add C:\Program Files (x86)\Arduino\hardware\tools\avr\etc to your Path (config file for AVRDude).
Remark: Otherwise, you have to install AVRDude.
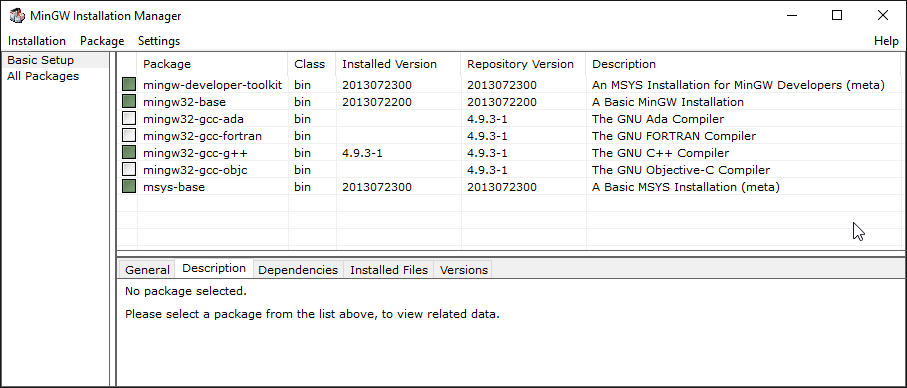
Bash with MinGW
A simple bash is needed. For that:
- Download and install MinGW, with the following packages;
- mingw-developer-toolkit
- mingw32-base
- mingw32-gcc-g++
- msys-base
- Add the "bin" folder to your Path (
C:\MinGW\bin); - Launch the MinGW bash (
C:\MinGW\msys\1.0\msys.bat).
Start compiling !
- With the MinGW bash (MinGW\msys\1.0\msys.bat), go to the source code folder
- Go to the subfolder
optiboot\bootloaders\optiboot - Start the
makeallscript
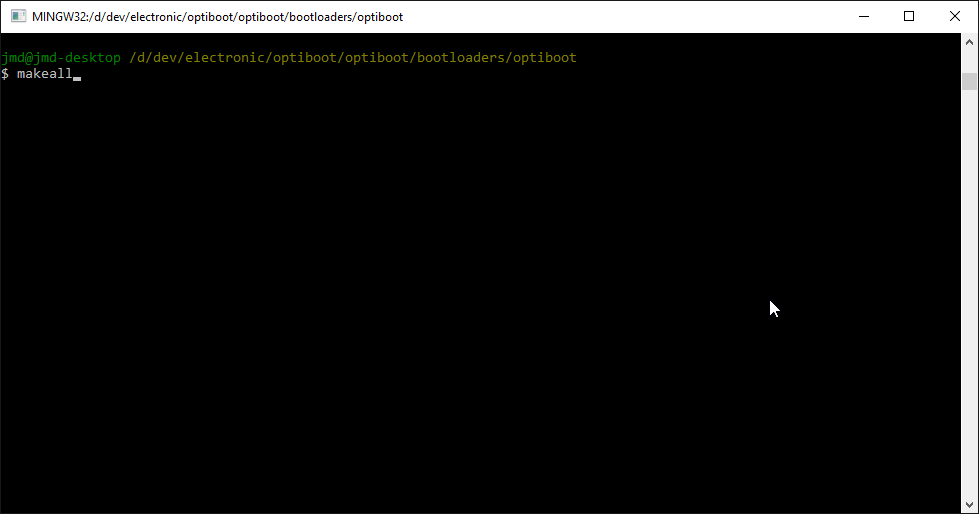
And you will see all the new bootloaders into the same folder !
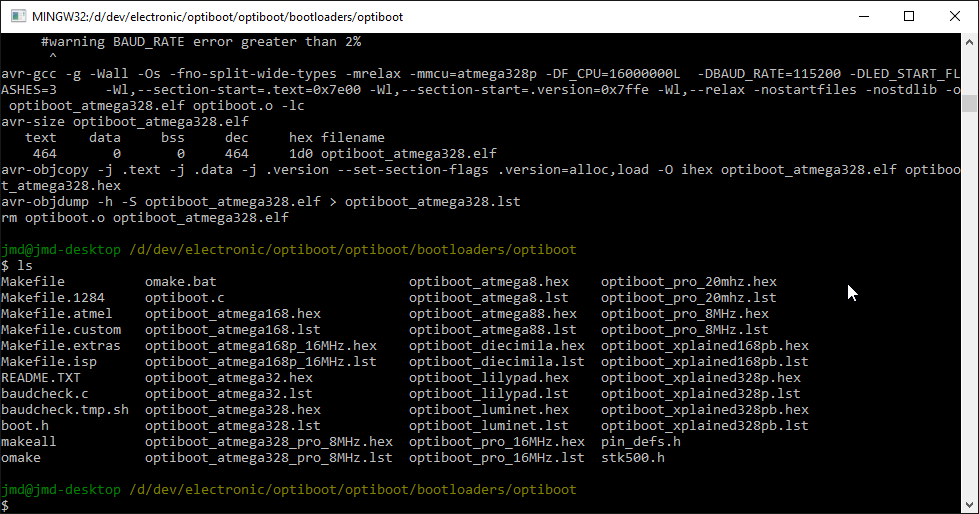
But not so fast, do not use them without checking the communication speed used to upload your sketches, embedded in the bootloader during the compilation.
Bootloader communication speed
By default, the baudrate used to talk to the bootloader is set to 115200 bauds.
It is not compatible with an AVR at a frequency of 8Mhz, and even not stable at 16MHz.
You can change the speed with the BAUD_RATE argument.
For example:
make atmega328_pro8 BAUD_RATE=57600
With an AVR at a frequency of 1Mhz, the safer speed is 3600 bauds (below 2% of communication errors).
However, some of my Arduino Pro Mini only works with 7200 bauds (around 2.1% of communication errors).
Create a 1Mhz bootloader
Add the following configuration to the makefile :
atmega328_pro1: TARGET = atmega328_pro_1MHz
atmega328_pro1: CHIP = atmega328
atmega328_pro1:
	$(MAKE) $(CHIP) AVR_FREQ=1000000L LED_START_FLASHES=3
	mv $(PROGRAM)_$(CHIP).hex $(PROGRAM)_$(TARGET).hex
	mv $(PROGRAM)_$(CHIP).lst $(PROGRAM)_$(TARGET).lst

atmega328_pro1_isp: atmega328_pro1
atmega328_pro1_isp: TARGET = atmega328_pro_1MHz
atmega328_pro1_isp: MCU_TARGET = atmega328p
# 512 byte boot, SPIEN
atmega328_pro1_isp: HFUSE ?= DC
# Low power xtal (8MHz) 6 KCK/14CK+65ms
# Divide clock by 8 internally
atmega328_pro1_isp: LFUSE ?= 62
# 1.8V brownout (0x06 equivalent to 0xFE)
atmega328_pro1_isp: EFUSE ?= 06
atmega328_pro1_isp: isp
Some explanations:
- AVR_FREQ: Frequency of the ATmega;
- LED_START_FLASHES: Led flashes when the bootloader starts;
- HFUSE: Value of the high fuse: Target a 512 bytes bootloader;
- LFUSE: Value of the low fuse: Use the internal oscillator (8Mhz), divide it by 8 (1Mhz), and keep the startup time used by default on the atmega328p (65ms);
- EFUSE : Value of the extended fuse: Brownout level at 1.8V.
To just create the HEX file:
make atmega328_pro1 BAUD_RATE=7200
To create the HEX file and flash the bootloader with an ISP programmer (here USBTinyISP):
make atmega328_pro1_isp BAUD_RATE=7200 ISPTOOL=usbtiny ISPPORT=usb
Remark: Depending on the target device the unused fuse bits will be read either as '0' or '1'. Depending on the AVRDude version, to pass the avrdude check, you have to force the EFUSE at 0xFE <=> 0x06 (it could be done in the makefile or in the command line with EFUSE=fe)
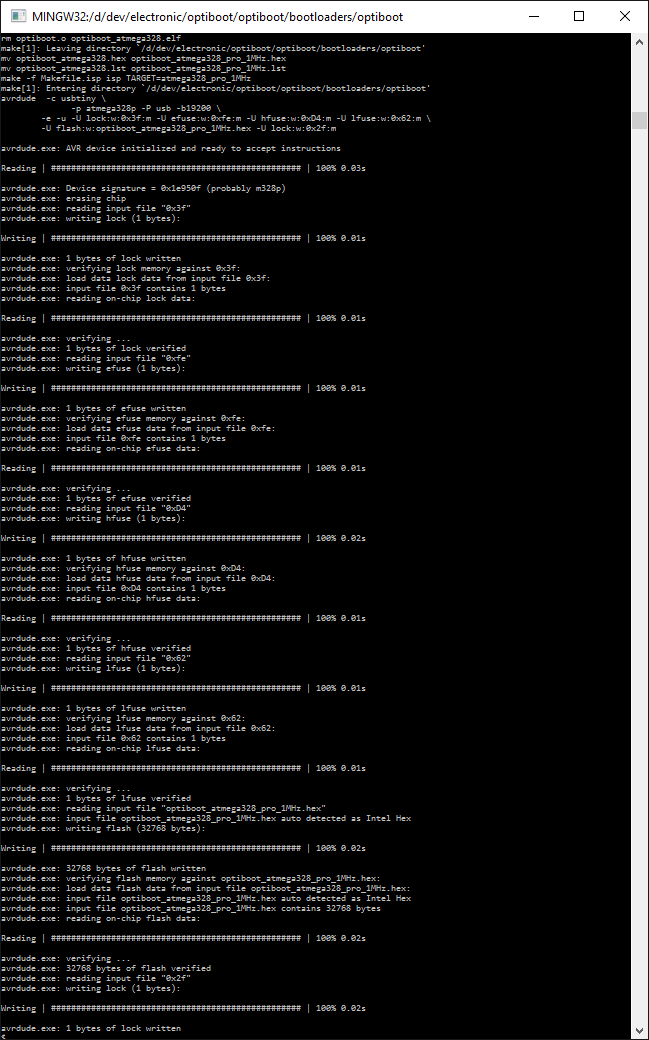
When the bootloader is flashed, the Arduino Pro mini flashes 3 times at each reboot !
Upload a sketch through the serial link
Now that the bootloader is flashed, it's time to upload some sketches with Arduino IDE or PlatormIO Editor (Atom).
To do that, I added a board, compatible with the bootloader, in the "boards.txt" file of the Arduino IDE (same process with PlatformIO).
PlatformIO: C:\Users\[user]\.platformio\packages\framework-arduinoavr\boards.txt
Arduino IDE: C:\Users\[user]\AppData\Local\Arduino15\packages\arduino\hardware\avr\[X.Y.Z]\boards.txt
promini1MhzInt.name=Arduino Pro Mini (1MHz internal, 1.8V)
promini1MhzInt.upload.tool=avrdude
promini1MhzInt.upload.protocol=arduino
promini1MhzInt.upload.maximum_size=32256
promini1MhzInt.upload.maximum_data_size=2048
promini1MhzInt.upload.speed=7200
promini1MhzInt.build.board=AVR_PRO
promini1MhzInt.build.mcu=atmega328p
promini1MhzInt.build.f_cpu=1000000L
promini1MhzInt.build.core=arduino
promini1MhzInt.build.variant=eightanaloginputs
After restarting the IDE, the new board is present.
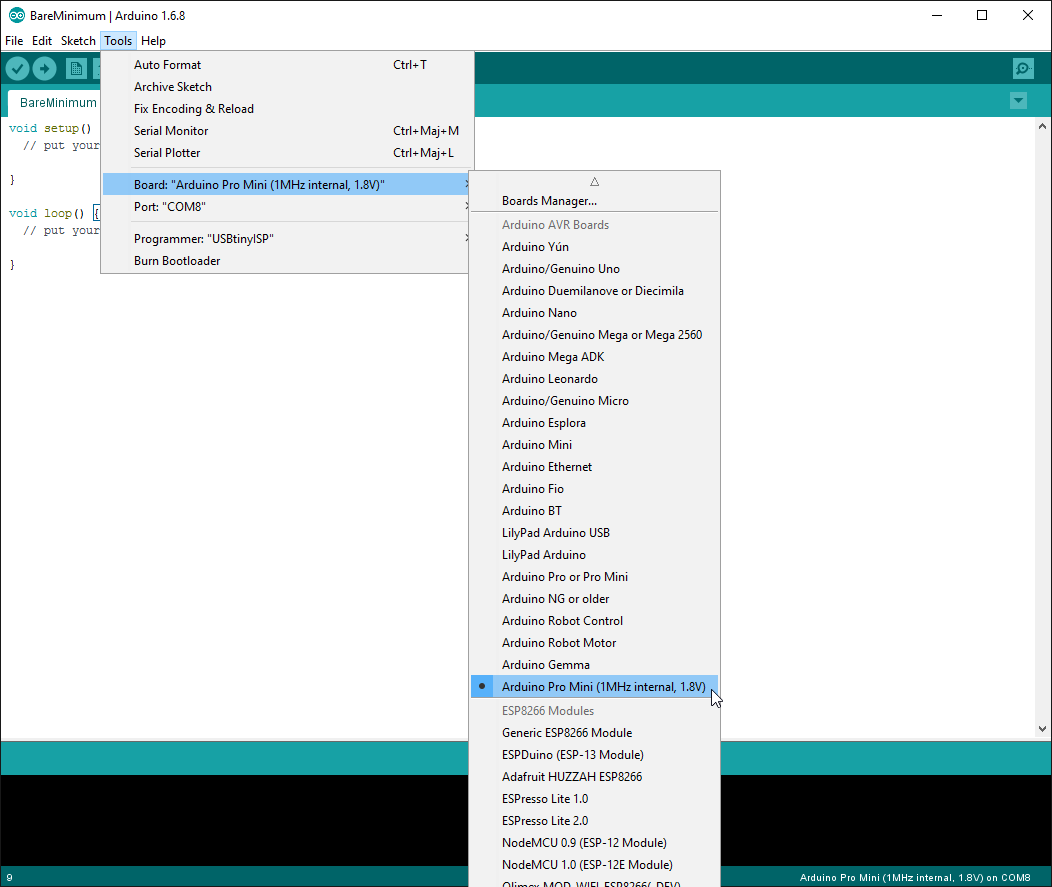
Now, I can select it and upload a sketch through the serial / USB interface (not ISP, that the goal of all this) !
You may need to try more than once before succeeding !

You can try to change the speed of the bootloader / upload at 3600 bauds, but it doesn't seems to work with some Arduino Pro Mini.